
Knowledge base
1000 FAQs, 500 tutorials and explanatory videos. Here, there are only solutions!
kAuth is a free mobile application that enhances and simplifies the security of Infomaniak accounts protected by two-factor authentication (or double authentication). It is one of the methods that allows you to secure access to your Infomaniak user account.
Preamble
- Two-step verification protects your account and personal data when logging into Infomaniak tools (manager.infomaniak.com and mail.infomaniak.com) by asking for:
- your password
- and a second security method
The app kAuth is one of these methods (learn more about 2FA)
Install the kAuth app
Prerequisites
- Have an Infomaniak account (know your username and password)
- Have a mobile device running iOS/Android
- Download the app from your mobile device by clicking on the link corresponding to your operating system:
Install and open the application.
Then, you have two options to link your Infomaniak accounts to kAuth:
- Log in from this mobile device (recommended):
- Open the kAuth app on your mobile device.
- Click on Log in from this mobile device.
- Enter the credentials for the Infomaniak account to link and authenticate your connection if necessary (need help?).
- Click the Authorize button.
- Log in from a computer (if you choose this method, you will need a computer connected to the Internet):
- Open the kAuth app from a mobile device.
- Click on Log in from a computer.
- On your computer, open the page manager.infomaniak.com/2fa
- if two-step verification is not yet activated: click on Activate and choose kAuth Application.
- if two-step verification is already activated: click on Add an option then choose kAuth Application.
- On your mobile device, click on Continue.
- If necessary, allow kAuth to access your camera (only required to scan the identification QR code).
- On your computer, click on Next to display the QR code to scan.
- Scan the QR code displayed on the computer.
Save the backup codes
If you have just activated double authentication, the application will automatically display your 10 personal backup codes.
Download and keep a copy of these codes as they will be the only way to access your account in case you lose your credentials or to access your account without access to your phone.
How the app works
When you attempt to log in to your account and after successfully entering your usual password, you receive a push notification on your mobile device asking you to authorize the connection ("YES / NO"), via a notification:
or directly in the app:
If the connection is authorized, the initial page is automatically redirected to the Infomaniak account. You do not need to manually enter a one-time code as with a traditional OTP app or a code sent by SMS.
And without an internet connection?
The notifications push do not work without an internet connection, but kAuth also works without an internet connection and always allows you to display a one-time code in the same way as a OTP traditional:
- Open kAuth from your mobile device.
- Click on the relevant Infomaniak account.
- Copy the one-time code (each code is valid for 30 seconds) on the login page:
You can always access your account while traveling or on vacation.
Add additional accounts
kAuth allows you to manage multiple Infomaniak accounts:
- Open kAuth from your mobile device.
- Click on the blue button :
- Repeat the steps described above to link the account.
Delete a kAuth account
To delete your Infomaniak identity from the kAuth app, you must disable the kAuth security method from the 2FA section of the Manager.
This guide explains how to disable two-factor authentication, also known as two-step verification (two-factor authentication in English, or 2FA) for logging into Manager Infomaniak (manager.infomaniak.com) or Mail Infomaniak (mail.infomaniak.com).
For security reasons, Infomaniak support will never disable a connection validation method enabled on an account upon simple request. You must strictly follow the procedures below.
Disable 2FA
If two-step verification is enabled and you wish to disable it:
- Click here to access 2FA management on the Manager Infomaniak.
- Click on the Remove button to disable security:

- Enter the password to log in to your account.
In case of trouble
Obviously, the procedure above requires logging in one last time with two-factor authentication to then be able to disable it.
If you do not have access to the kAuth application or the device that receives the validation SMS, there is no point in calling Infomaniak; in this case, you will have no choice but to provide a number of security elements manually or via the app Infomaniak Check (kCheck) to regain access to your account:
- Click here to access the login page for Manager Infomaniak.
- Enter the username and the usual and correct password.
- When prompted for additional authentication, click on the alternative methods:

- Choose to enter one of your backup codes if you had downloaded the sheet when activating 2FA:

- Otherwise, select the last option to request help to access the form allowing you to submit your ID documents and recognition selfie:

- Follow the procedure to the end and wait:

This guide explains how to enable two-step verification, also known as two-factor authentication (2FA) or multi-factor authentication, to secure your connection to your Manager Infomaniak.
Preamble
- This two-step verification protects your account and personal data with your chosen password and a second method of identity verification, such as a code obtained on your mobile device.
- If a malicious person were to crack or steal your password, they would still need a validation code that only the legitimate user can obtain on their mobile device.
- Refer to this other guide if you are an administrator of an Organization and wish to enforce 2FA on all users who have not yet activated it.
Enable two-step verification
To increase the security level of your Infomaniak account:
- Click here to access the management of two-step verification on the Infomaniak Manager.
- Display and choose the authentication method from:
- The app kAuth for iOS / Android devices to simply tap a push notification YES / NO to authorize or deny the connection
- Any OTP application to obtain a unique connection code at a given time
- YubiKey (from Yubico)
- SMS reception (only for countries CH / FR / BE / DE) to obtain a unique connection code at a given time
Follow the on-screen instructions to complete the procedure.
Keep the backup codes safe.
Be mindful of existing synchronizations
Once strong authentication is activated, to access certain tools (such as synchronization tools) it is necessary to create application passwords.
There is no need to call Infomaniak as they do not have any of your codes & passwords in their possession. For any help request regarding 2FA, refer to this other guide.
Authenticate on every browser opening
To request not to save cookies when closing browser windows, and thus request authentication each time you access the Infomaniak Manager when you restart the browser…
... on Chrome
Specify in Google Chrome settings (chrome://settings/content/siteData to paste into the address bar or refer to the official documentation) the address [*.]infomaniak.com:
This guide explains how to require users of your Organization to activate two-factor authentication (2FA), then verify that it remains activated afterwards.
Introduction
- Each Infomaniak user has the ability to activate two-step verification for access to their account, which significantly increases the security of all the Organization's services...
- A legal representative can require this activation, otherwise access to the Manager and Web apps will no longer be possible for the user.
- Access to desktop apps (desktop application on macOS / Windows / Linux) and mobile apps (application for smartphone or iOS / Android tablet) will always be possible without 2FA.
- It is recommended to inform users of your Organization in advance, to allow them to continue using the services.
- If an external user does not wish to perform the operation requested by an Organization administrator, they can choose to leave the Organization instead of activating it.
Identifying users without 2FA
You can easily identify people who have not yet activated this security feature on their account:
- Click here to access your Organization's user management.
- This red symbol means that 2FA is not activated:

- You can also filter long lists with this specific criterion to display only users who have not yet activated 2FA:

- To easily alert a user about the security of their account, click on the action menu ⋮ located to its right.
- Click on Send a security alert to send an automatic email to the user informing them of their different settings:

Require activation of 2FA
Prerequisites
- You must be an Administrator or Legal representative within the Organization.
To access the settings:
- Click here to access the Organization's security management on the Infomaniak Manager (need help?).
- Click on the toggle switch button to activate an additional login verification requirement for all users of the Organization:

- Confirm the activation of the feature in the window that opens.
- Once the feature is activated, Organization users who have not yet activated 2FA receive a message (from the next action on their account) prompting them to configure an additional authentication method from those offered and preventing them from taking any other action before this one:

This guide concerns the mobile app kCheck (application for iOS/Android smartphone or tablet), created to simplify identity verification procedures and strengthen the security of your Infomaniak account.
Preamble
- For security reasons, to ensure the identity of the person making a specific request to Infomaniak, an identity verification procedure may be triggered in the following cases (non-exhaustive list):
- user password forgotten
- login email address forgotten
- deactivation of two-factor authentication (2FA)
- unlocking an Infomaniak account
- during the first transfer of revenue for the product Billetterie
- when ordering a product (suspicion of spam or fraud, brand name, etc.)
- This app allows you to securely transfer the requested items.
- Infomaniak respects your privacy: the information transmitted via the kCheck application will be kept until your file is fully processed; it will in any case be automatically deleted after 72 hours if this request is not processed.
Start the identity verification
Prerequisites
- A QR code or a link provided by Infomaniak.
- The mobile app kCheck installed on your device iOS (iPhone, etc.) or Android.
- An internet connection on the mobile device.
You can then have your identity verified with kCheck:
- Launch the kCheck app on your mobile device.
- Tap Start.
- Press Scan a QR code.
- Point the QR code at the camera.
- Enter your mobile phone number.
- Enter the confirmation code received.
- Enable location services (required to continue the procedure).
- Select the type of ID you have (ID card or passport).
- Follow the steps to photograph your ID.
- Take a selfie (of yourself) holding your ID in front of you.
Your documents will then be securely transmitted to Infomaniak support. These requests are processed on a priority basis with an average response time of 2 hours during opening hours.
If your order is blocked...
For security reasons, some orders may be automatically blocked.
When you place your order, an email is sent to the email address associated with your Infomaniak Manager account. This email contains the procedure to unblock your order. If you cannot find it, you can resend it from your Manager by clicking on Resend procedure from the red banner informing you of the blockage.
Prerequisites
- Open the email containing the unlocking procedure.
- The mobile app kCheck installed on your device iOS (iPhone, etc.) or Android.
- An internet connection on the mobile device.
You can then start the unlocking procedure with kCheck:
- Launch the kCheck app on your mobile device.
- Tap Start.
- Press Scan a QR code.
- Scan the QR code in the email.
- Follow the unlocking procedure to the end.
Special cases
- If you do not respond within 10 days, the order will be automatically canceled and the payment will be fully refunded to the payment method used.
- If you do not have a mobile device to follow this procedure, contact Infomaniak support.
This guide provides instructions to synchronize kDrive with a NAS Qnap (or vice versa) via the WebDAV protocol found in the HBS 3 Hybrid Backup Sync application.
COMPATIBILITY my kSuite ✗ | my kSuite+ ✗ ✔= Compatible offer | ✗= Not available |
Prerequisites
- Have a Qnap NAS accessible from the Internet.
- Know your kDrive identifier (kDrive ID).
Synchronize kDrive and Qnap via HBS 3
To do this:
- Log in to the Qnap NAS administration interface (QTS).
- If necessary, download and install the app HBS 3 Hybrid Backup Sync.
- Open HBS 3.
- Go to Sync from the left menu.
- Create a synchronization task (Two-way Sync Job).
- Select WebDAV from the list of Cloud providers:

- For the account settings, use the following information:
- Server address:
https://IDkDrive.connect.kdrive.infomaniak.com(see prerequisites above) - Username: email address used to log in to the Infomaniak user account
- Password: application password if two-factor authentication is enabled or the one for your Infomaniak user account if you have not enabled 2FA
- Server address:
- Select the local and destination folders:

- Customize the task frequency.
- Finish the assistant.
This guide explains how to import external data (files, folders, etc.) into your kDrive using the WebDAV protocol.
Preamble
- Refer to this other guide if you are looking for information on how to copy specific data from one kDrive to another when your user has access to both kDrive accounts.
Import external data via WebDAV
To access the import tool, where the data needs to be imported:
- Click here to access the Web app kDrive Infomaniak (online service kdrive.infomaniak.com).
- Click on the Settings icon at the top right.
- Check or select the kDrive in question from the dropdown menu on the left sidebar.
- Click on General in the left sidebar.
- Click on Import external data:

- Click the blue Start button.
- Click on WebDAV.
- Fill in the required information based on the source (especially the WebDAV address you have - obtained from the source).
- Select the destination kDrive and the desired location to store the imported data.
- Click on Start:

Example: copy data from an external kDrive to the Organization
To import a kDrive that would be outside of the Organization in which your destination kDrive is located, you must enter the following information at point 9 above (your credentials will be used exclusively to import your data; they will be immediately deleted at the end of the process):
- Username: email address to log in to the Infomaniak user account
- Password: application password if two-factor authentication is enabled or the one from your Infomaniak user account if you have not enabled 2FA
- Entry point: direct access to kDrive (refer to this other guide regarding the kDrive ID for the connection URL)
- It is possible to choose a subfolder as the source folder, by combining the kDrive ID and the desired folder by entering for example
https://IDkDrive.connect.kdrive.infomaniak.com/My/Subfolderorhttps://IDkDrive.connect.kdrive.infomaniak.com/MykDrive/My/Subfolder
- It is possible to choose a subfolder as the source folder, by combining the kDrive ID and the desired folder by entering for example
Refer to this other guide regarding the use of your kDrive via the WebDAV protocol.
This guide offers a solution for users wishing to increase the security level of their email, on a particularly weak point if you use an email software/client to check your emails.
All passwords are stored
When you use the Infomaniak online interface mail.infomaniak.com to view and send your emails, it is accessible via your Infomaniak account on which two-factor authentication (2FA) is enabled.
Indeed, all the passwords for each of the email addresses you have attached to mail.infomaniak.com are stored, and you will not need to enter them each time you want to check your messages.
But before that, you provide 3 pieces of information:
- your login ID
- the password for this login ID
- you then validate your access request using one of the additional available methods
In all logic, a person in possession of your Infomaniak password will therefore not be able to access your mailbox if they do not also have access to your mobile device.
Case of an email software/client
Two-factor authentication (2FA described above) does not exist directly with email retrieval protocols of the IMAP type. An email address has a password, and that's it.
Therefore, an email client installed on a computer will also store all the passwords for each of the attached email addresses, but will not ask for a login password.
There is a solution with Mozilla Thundebird:
- Open the email client software.
- At the top right, click on the menu button with three horizontal lines ☰ .
- Click on Preferences (and not on Account Settings):

- Click on Privacy and security in the left-hand menu.
- Scroll down to the Passwords section (all your stored email passwords are here).
- Check the box Use a master password:

- Click on the button in the same place to set your new password for opening the software/client of the email:

To finish:
- Close and then restart Thunderbird.
- Upon reopening, enter your master password.
- If you enter the password correctly, you will have access to your accounts.
- In case of failure, Thunderbird will still open, but it will ask for the master password again.
This method especially protects you if you share your environment with other users.
Also, familiarize yourself with fingerprint security for checking emails on the mobile app Infomaniak Mail.
This guide explains how to create, save and edit an Office file (text, spreadsheet, presentation...) on the mobile app kDrive (app for iOS/Android smartphone or tablet) or even via a third-party mobile app.
Preamble
- Refer to this other guide if you are looking for information on editing documents on the kDrive web app (online service kdrive.infomaniak.com).
- Your files are never analyzed and are exclusively stored in Switzerland.
Create and edit an Office document
Prerequisites
- Have a kDrive.
- Have the mobile app kDrive (app for iOS/Android smartphone or tablet).
The mobile app kDrive (application for iOS/Android smartphone or tablet) natively integrates the applications Docs, Grids and Points which allow you to create, edit and collaborate online on documents of type Word .docx, Excel .xlsx and PowerPoint .ppsx:
Edit an Office document from a dedicated mobile app
Prerequisites
- Know your kDrive identifier (kDrive ID)
To further edit documents from your kDrive on an iOS / Android device, use the recommended app to edit your Word, Excel, and PowerPoint documents. Perform the following procedure once to then access your kDrive without limitations:

Download the iOS version / Download the Android version
- Download Documents for your mobile device (link above).
- Open the app on your device.
- Go to the Clouds menu at the bottom of the screen.
- Select WebDAV from the list of Clouds.
- For the account settings, use the following information:
- Server address:
https://IDkDrive.connect.kdrive.infomaniak.com(read the prerequisites above) - Username: email address used to log in to the Infomaniak user account
- Password: application password if two-factor authentication is enabled or the one for your Infomaniak user account if you have not enabled 2FA
- Server address:
- Access your kDrive and edit Word, Excel, and PowerPoint files from the Clouds menu at the bottom of the screen.
This guide details how to import data from iCloud using rClone on kDrive Infomaniak.
COMPATIBILITY my kSuite ✗ | my kSuite+ ✗ ✔= Compatible offer | ✗= Not available |
Preamble
- Since Apple does not offer an API like its competitors, one solution to retrieve documents from an iCloud Drive is to install the app kDrive macOS to synchronize the icloud folder, which should be in your library. The guide below offers a solid alternative.
1. Set up rclone for drive access
Installing rclone on your computer
There is a version of rclone with a graphical interface (GUI) but it is quite possible to do this via command line (CLI):
- Install rclone from a terminal application on your device by entering the following command:
sudo -v ; curl https://rclone.org/install.sh | sudo bash - Enter the password for your session on your computer to start the installation:

- Refer to the official installation guide if necessary.
Configuration of the remote drive (iCloud) on rclone
- Once rclone is installed, enter the command
rclone config.- Refer to the official configuration guide if necessary.
- Then choose to configure a new remote import by answering
nforNew remote. - Name the remote disk, for example
appledrive:
- Then choose the type of drive to import by responding with
iclouddrive, which corresponds to iCloud Drive among the options offered. - Specify the
apple_idto rclone by entering your Apple ID (usually an email address). - Choose to use your own password linked to the Apple ID account (
y). - Enter your password twice as prompted:

- Answer “No”
nto the question about “advanced configuration”. - A window on your device should open to warn you of a remote connection; authorize it:

- A window on your device should open with a 2FA code; copy it:
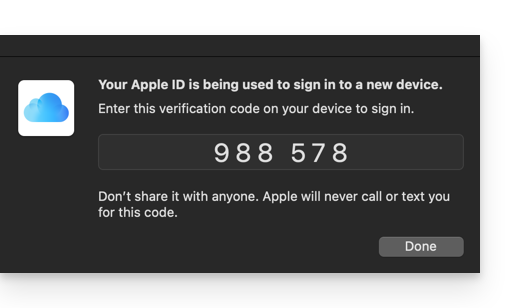
- Paste the code when rclone it asks you.
- Answer “Yes”
yto the last question if all the presented information is correct.
Setting up the destination drive (kDrive) on rclone
It is possible to act directly on the configuration file of rclone by pasting your kDrive configuration in the following format, for example:
[kDrive]
type = webdav
url = https://kDrive_ID_HERE.connect.kdrive.infomaniak.com/
vendor = other
user = user@email.com
pass = PASSWORD_HERE_OR_APP_PASSWORD_IF_2FA
But here is how to proceed step by step, just like for the previous configuration:
- Still in the terminal, enter
nfor a new disk configuration and enter the namekDriveto recognize your destination disk:
- Then choose the type of disk to import by entering
webdav, which corresponds to a WebDAV configuration among the options offered. - Enter the following information:
url= direct access to kDrive (refer to this other guide regarding the kDrive ID for the connection URL)vendor= rclone (option number 6)user= email address for logging into the Infomaniak user account
- Answer “Yes”
ywhen prompted for the password, then enter the password:- application password if two-factor authentication is enabled or the one for your Infomaniak user account if you have not enabled 2FA.
- Leave
bearer_tokenempty, then answer “No”nto the question about “advanced configuration”. - Answer “Yes”
yto the last question and your 2 drives will be displayed:
2. Copy iCloud data to kDrive
Prerequisites
- Check the available options on the official guide before starting an import.
Example command to start copying your iCloud data to the root of your kDrive:
sudo rclone copy appledrive: kDrive:This will instantly start copying your folders, subfolders, and iCloud contents to your personal folder in your Infomaniak kDrive!
Details about the dates of your exported photos
If you export your photos from iCloud to kDrive Infomaniak, be mindful of the date metadata. During export, the file creation dates may be altered and replaced with the export date instead of the original capture date.
Here is a script for advanced users that allows you to restore the correct data to your files from the EXIF information (it is recommended to process batches of 7000 photos max. to avoid a crash):
- Download ExifTool https://exiftool.org/index.html (MacOS Package).
- Install the application by allowing it to open beforehand if necessary:

- Open Script Editor (located in your Applications > Utilities folder):

- Click on New document.
- Copy and paste the long script below into the Script Editor window.
- Click on Run to start the script, a window opens:

- Select the folder to analyze.
- Let the script run, it will modify the dates or write errors in a file errors.txt on the desktop.
The script to copy and paste in full:
-- remplace date du fichier par la date exif creation

tell application "Finder"
    set Chemin to choose folder with prompt "Sélectionnez le dossier contenant les fichiers à redater"
    my inspecter(Chemin)
end tell

on inspecter(un_dossier)
    tell application "Finder"
        -- traitement des fichiers :
        set les_fichiers to files of un_dossier
        repeat with chaque_fichier in les_fichiers
            -- traitement d'un fichier

            set lefichier to chaque_fichier
            set AppleScript's text item delimiters to {""}
            set nom to name of chaque_fichier --récupère le nom du fichier
            set extens to document file nom in un_dossier --recupere l extension du fichier
            set lextension to name extension of extens
            set sauv to AppleScript's text item delimiters --sauvegarder la variable delimiteur
            set AppleScript's text item delimiters to {"."} --récupère la partie avant le dernier "."
            set elements to text items of nom
            set nomcourt to (items 1 thru -2 of elements) as string
            set ancien_nom to nomcourt
            set AppleScript's text item delimiters to sauv --restaurer la variable delimiteur

            set chaque_fichier to chaque_fichier as string

            try
                set datephoto to do shell script "/usr/local/bin/exiftool -DateTimeOriginal " & quoted form of POSIX path of chaque_fichier
                if datephoto is "" then set datephoto to do shell script "/usr/local/bin/exiftool -CreationDate " & quoted form of POSIX path of chaque_fichier
                if datephoto is "" then set datephoto to do shell script "/usr/local/bin/exiftool -CreateDate " & quoted form of POSIX path of chaque_fichier


            on error
                -- Ecrit un fichier erreur sur le bureau si erreur chargement date
                set lelog to open for access ((path to desktop folder as text) & "errors.txt") as text with write permission
                write "Le fichier ne contient pas de date  : " & chaque_fichier & return to lelog starting at eof
                close access lelog

                set datephoto to ""
            end try

            if length of datephoto > 20 then
                set x to (length of datephoto) - 33
                set DateOriginale to text -x thru -1 of datephoto
                set ladate to text 1 thru 5 of DateOriginale
                set lannee to ladate
                set ladate to ladate & text 7 thru 8 of DateOriginale
                set lemois to text 7 thru 8 of DateOriginale
                set ladate to ladate & text 10 thru 11 of DateOriginale
                set lejour to text 10 thru 11 of DateOriginale
                set ladate to ladate & text 13 thru 14 of DateOriginale
                set lheure to text 13 thru 14 of DateOriginale
                set ladate to ladate & text 16 thru 17 of DateOriginale
                set lesminutes to text 16 thru 17 of DateOriginale
                set ladate to ladate & "." & text 19 thru 20 of DateOriginale
                set lessecondes to text 19 thru 20 of DateOriginale
                set newnom to lannee & "-" & lemois & "-" & lejour & " " & lheure & "." & lesminutes & "." & lessecondes

                set xxx to ladate as string

                if xxx is " 000000000000.00" then
                    -- Ecrit un fichier erreur sur le bureau si erreur chargement date(=0000...)
                    set lelog to open for access ((path to desktop folder as text) & "errors.txt") as text with write permission
                    write "Le fichier ne contient pas de date : " & chaque_fichier & return to lelog starting at eof
                    close access lelog
                else
                    do shell script "touch -t " & ladate & " " & quoted form of POSIX path of chaque_fichier
                end if
            end if

            if datephoto is not "" then

            else
                set lelog to open for access ((path to desktop folder as text) & "errors.txt") as text with write permission
                write "Le fichier ne contient pas de date  : " & chaque_fichier & return to lelog starting at eof
                close access lelog
            end if

        end repeat

        -- traitement des dossiers :
        set les_dossiers to folders of un_dossier
        repeat with chaque_dossier in les_dossiers
            -- traitement d'un dossier
            my inspecter(chaque_dossier)
        end repeat
    end tell

end inspecter
tell application "Finder"
    (display dialog ("waouou ... Ca y est c'est fait !") buttons {"Salut !"})
end tell