
Knowledge base
1000 FAQs, 500 tutorials and explanatory videos. Here, there are only solutions!
Ticketing: managing an event
This guide explains how to manage an event (as part of the ticketing system Infomaniak).
Go to the event page
To this end:
- Click here in order to access the management of your product on the Manager Infomaniak (Need help?).
- Click directly on the nameallocated to the ticket office concerned by the event.
- Click on Programming in the left side menu.
- Click on Event in the left side menu.
- Choose the desired event:

The Overview
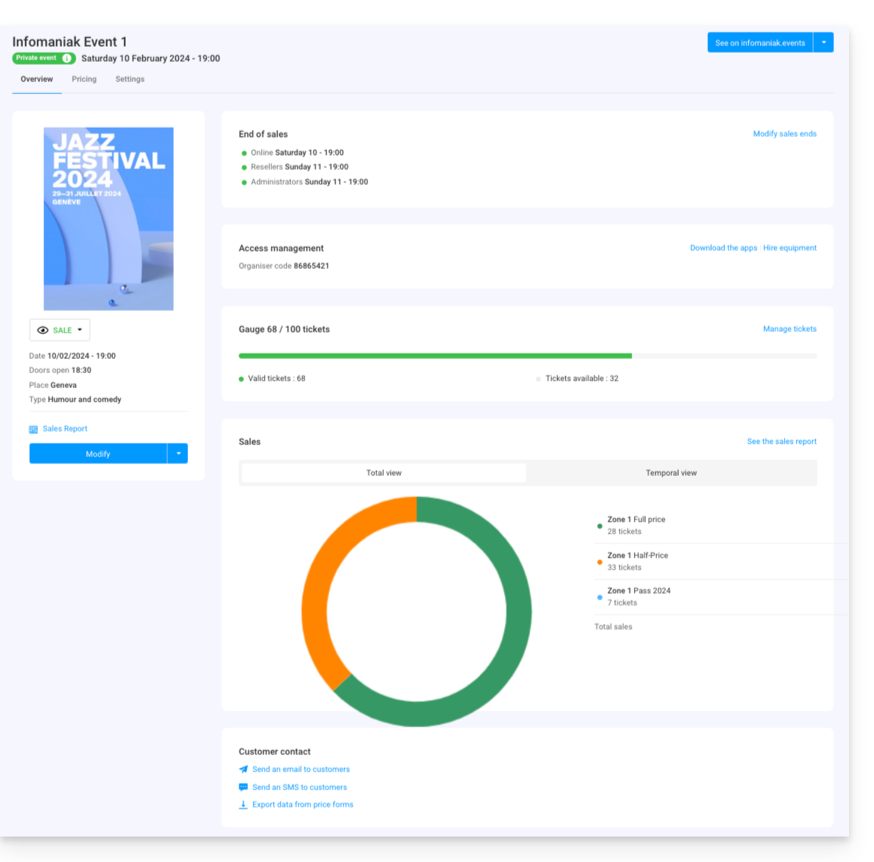
The overview provides an overview of your event:
- On the left, the information and status of the event. You can change the visibility of the event, access the sales report and make changes to the event:

- The end-of-sales information and ticket control access codes are at the top of the right-hand column:

- A graph summarizing the number of tickets sold and recipes per fare allows you to track your sales:

- The options for the event's customers can be found at the bottom of the page. These make it possible to contact customers who bought tickets at this event and export the resultforms they would have completed:

- The button at the top right allows you to go to the online version of the event on your ticket office and, if you decide to integrate the event on your site, access the integration options:

Differences in multidate events
If your event has multiple representations, the information will be broken down according to the page you are viewing. You will find the following:
- On the main page, the general information and settings applicable to all dates.
- On the pages of each date or representation, you will find the information of that date or representation.
Manage rates, ticket templates, hours of sales closures
You can switch to these options in the tabs on the top bet of the event page:
Link to this FAQ: