Knowledge base
1000 FAQs, 500 tutorials and instructional videos. Here, there are only solutions!
Install n8n on Infomaniak hosting
This guide will help you install n8n on Infomaniak, a powerful and extensible workflow automation solution.
Preamble
- Unlike tools like Zapier or Make, n8n, a “fair-code” workflow automation tool, can be self-hosted, allowing you to maintain full control over your data while connecting hundreds of services through an intuitive visual interface.
- If needed, local partners referenced by Infomaniak can handle these procedures: launch a free call for tenders; they take care of everything, freeing you from technical details — also discover the role of the host.
Installation of n8n
Prerequisites
- Have installed a blank Node.js type site on a Web Hosting or Infomaniak Cloud Server.
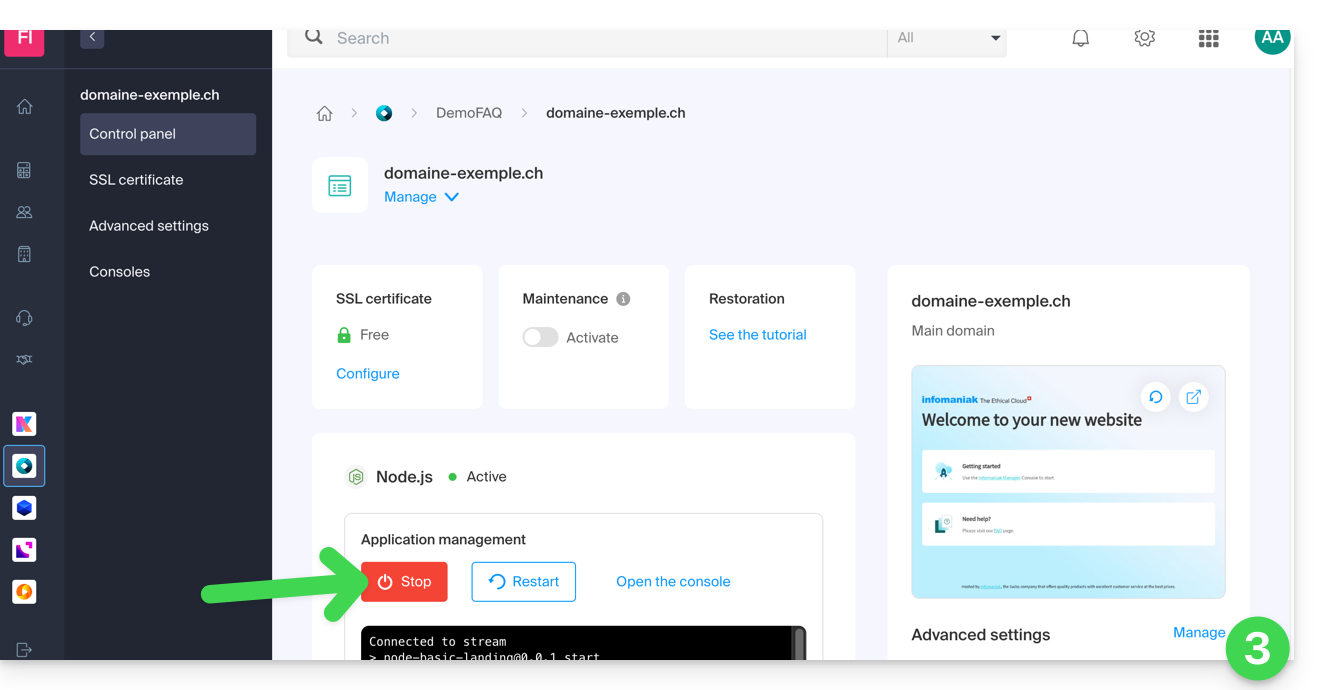
- Stop your Node.js application before proceeding with the installation!
To configure your hosting (via the Infomaniak Manager):
- Click here to access the management of your product on the Infomaniak Manager (need help?).
- Click directly on the name assigned to the product concerned.
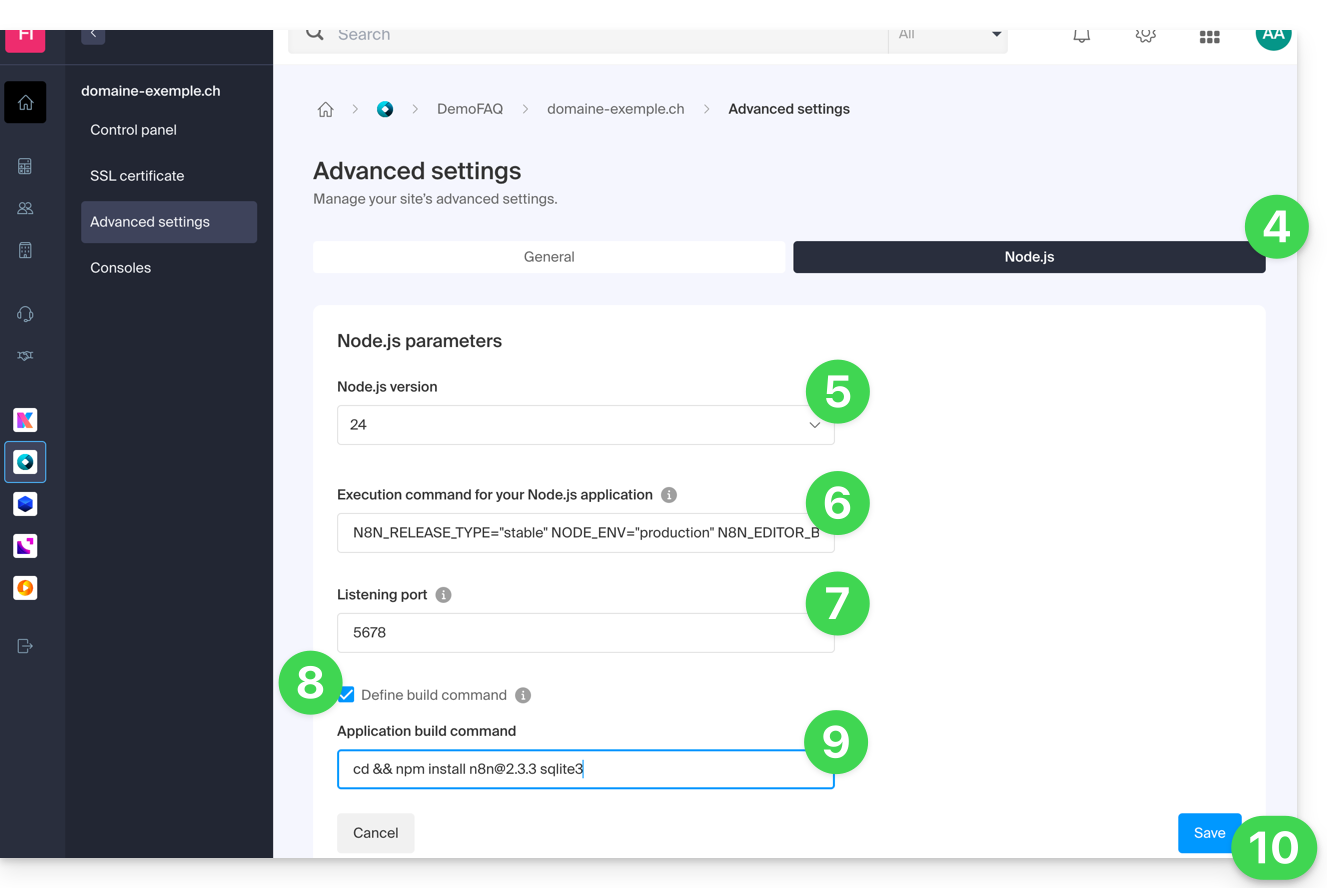
- Stop the application if necessary, then click on Manage under Advanced Settings:
- Click on the Node.js tab to access the settings.
- Select a recent version (e.g., 24 or higher).
Enter the following command, replacing
https://domaine.xyzwith the actual address of your site:N8N_RELEASE_TYPE="stable" NODE_ENV="production" N8N_EDITOR_BASE_URL="https://domaine.xyz" WEBHOOK_URL="https://domaine.xyz" GENERIC_TIMEZONE="Europe/Zurich" /srv/customer/node_modules/.bin/n8n start- Specify
5678for the listening port. - Check the box "Set the build command".
Enter the following command:
cd && npm install n8n@latest sqlite3- Click on Save:
- Start the Build step by clicking the Start button under Application Build:
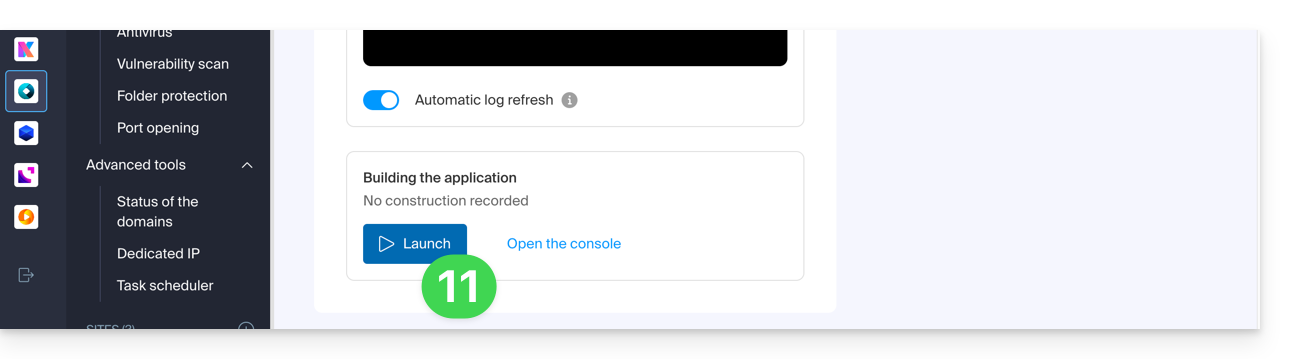
- On the main page, click the Start (or Restart) button:

- Wait a few minutes, then go to your site's URL (e.g.,
https://domain.xyz). - On your first connection, n8n will ask you to create an owner account to secure your instance.
Your n8n instance is now operational! You can start creating your automations.
If you encounter an error indicating that the port is already in use when starting:
- Temporarily change the Node.js Version in the settings (e.g., switch from v24 to v23) and save. This forces a complete stop of the processes.
- Set the desired version (v24) again and save.
- Restart the application.
Link to this FAQ:
Has this FAQ been helpful?