Knowledge base
1000 FAQs, 500 tutorials and instructional videos. Here, there are only solutions!
Import data to kDrive from iCloud
This guide details how to import iCloud data using rClone on kDrive Infomaniak.
✘ UNAVAILABLE with
kSuite free / kSuite Standard
my kSuite / my kSuite+ (ik.me, etik.com, ikmail.com)
Preamble
- Since Apple does not provide an API like its competitors, a solution to retrieve documents from an iCloud Drive is to install the kDrive macOS app to synchronize the icloud folder which should be in your library. The guide below offers a solid alternative.
- kDrive supports rclone streaming upload via WebDAV, up to 50 Go (extendable to 100 Go) to prevent abuse, with automatic error handling if the limit is exceeded without prior specification of the size via
Content-Length.
1. Configure rclone for drive access
Install rclone on your computer
There is a version of rclone with a graphical interface (GUI) but it is quite possible to do this via command line (CLI):
- Install rclone from a
Terminal-type application on your device by typing the entire following command:sudo -v ; curl https://rclone.org/install.sh | sudo bash - Enter the password for your session on your computer to start the installation:

- Refer to the official installation guide if necessary.
Configure the remote disk (iCloud) on rclone
- Once rclone is installed, enter the command
rclone config.- Refer to the official configuration guide if necessary.
- Then choose to configure a new remote import by answering
nforNew remote. - Name the remote disk, for example
appledrive:
- Then choose the type of disk to import by answering
iclouddrivewhich corresponds to iCloud Drive among the choices offered. - Indicate to rclone the
apple_idby entering your Apple ID (an email address in principle). - Choose to use your own password linked to the Apple ID account (
y). - Enter your password twice as requested:

- Answer “No”
nto the question about “advanced configuration”. - A window on your device should open to warn you of a remote connection; authorize it:

- A window on your device should open with a 2FA code; copy it:
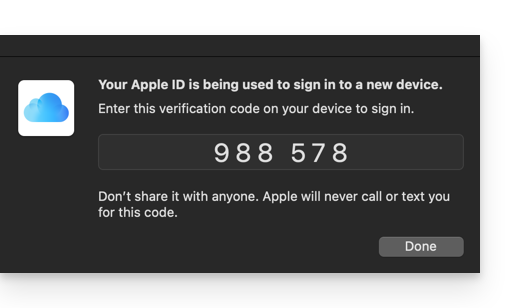
- Paste the code when rclone asks for it.
- Answer “Yes”
yto the last question if all the information presented is correct.
Configuration of the destination disk (kDrive) on rclone
It is possible to act directly on the configuration file of rclone by pasting your kDrive configuration in it in the form for example:
[kDrive]
type = webdav
url = https://kDrive_ID_HERE.connect.kdrive.infomaniak.com/
vendor = other
user = user@email.com
pass = PASSWORD_HERE_OR_APP_PASSWORD_IF_2FA
But here is how to proceed step by step as for the previous configuration:
- Still on the terminal, enter
nfor a new disk configuration and enter the namekDriveto recognize your destination disk:
- Then choose the type of disk to import by answering
webdavwhich corresponds to a WebDAV configuration among the choices offered. - Enter the following information:
url= direct access to kDrive (refer to this other guide regarding the kDrive ID for the connection URL)vendor= rclone (option number 6)user= email address to log in to the Infomaniak user account
- Answer “Yes”
yfor the question about the password, then enter the password:- application password in case of double authentication activated or the one of your Infomaniak user account if you have not activated 2FA.
- Leave the
bearer_tokenblank, then answer “No”nto the question about the “advanced configuration”. - Answer “Yes”
yto the last question and your 2 disks are displayed:
2. Copy data from iCloud to kDrive
Prerequisites
- Consult the options available on the official guide before starting an import.
Example command to initiate a copy of your iCloud data to the root of your kDrive:
sudo rclone copy appledrive: kDrive:This will immediately start copying your iCloud folders, subfolders, and contents to the personal folder of your Infomaniak kDrive!
Details about the dates of your exported photos
If you export your photos from iCloud to Infomaniak kDrive, be mindful of the date metadata. During export, the file creation dates may be modified and replaced with the export date instead of the original photo date.
Here is a script for advanced users that allows you to restore the correct data to your files from the EXIF information (it is recommended to process batches of 7000 photos max. to avoid crashes):
- Download ExifTool https://exiftool.org/index.html (macOS Package).
- Install the application by authorizing its opening in advance if necessary:

- Open Script Editor (located in your Applications > Utilities folder):

- Click on New Document.
- Copy and paste the long script provided below into the Script Editor window.
- Click on Run to start the script, a window opens:

- Select the folder to analyze.
- Let the script run, it will modify the dates or write errors to a file
errors.txton the desktop.
The script to copy and paste entirely:
-- replace file date with EXIF creation date or date from name after the first dash -

tell application "Finder"
    set FolderPath to choose folder with prompt "Select the folder containing the files to update"
    my processFolder(FolderPath)
end tell

on processFolder(aFolder)
    tell application "Finder"
        -- process files:
        set fileList to files of aFolder
        repeat with eachFile in fileList
            -- process a single file

            set theFile to eachFile
            set AppleScript's text item delimiters to {""}
            set fileName to name of eachFile --get the file name

            set eachFile to eachFile as string --file path
            set hasDate to true --initialize date found flag

            try
                --get date if available
                set photoDate to do shell script "/usr/local/bin/exiftool -DateTimeOriginal " & quoted form of POSIX path of eachFile
                if photoDate is "" then set photoDate to do shell script "/usr/local/bin/exiftool -CreationDate " & quoted form of POSIX path of eachFile
                if photoDate is "" then set photoDate to do shell script "/usr/local/bin/exiftool -CreateDate " & quoted form of POSIX path of eachFile

                if photoDate is "" then
                    set hasDate to false --check if date was found
                end if

            on error
                set hasDate to false -- error retrieving date
                set photoDate to ""
            end try

            if length of photoDate > 20 then
                --format extracted date
                set x to (length of photoDate) - 33
                set OriginalDate to text -x thru -1 of photoDate
                set formattedDate to text 1 thru 5 of OriginalDate
                set theYear to formattedDate
                set formattedDate to formattedDate & text 7 thru 8 of OriginalDate
                set theMonth to text 7 thru 8 of OriginalDate
                set formattedDate to formattedDate & text 10 thru 11 of OriginalDate
                set theDay to text 10 thru 11 of OriginalDate
                set formattedDate to formattedDate & text 13 thru 14 of OriginalDate
                set theHour to text 13 thru 14 of OriginalDate
                set formattedDate to formattedDate & text 16 thru 17 of OriginalDate
                set theMinute to text 16 thru 17 of OriginalDate
                set formattedDate to formattedDate & "." & text 19 thru 20 of OriginalDate
                set theSecond to text 19 thru 20 of OriginalDate
                set newName to theYear & "-" & theMonth & "-" & theDay & " " & theHour & "." & theMinute & "." & theSecond

                set testValue to formattedDate as string --check if found date is 000
                if testValue is " 000000000000.00" then
                    set hasDate to false
                else
                    -- set file date to original EXIF date and write to log
                    do shell script "touch -t " & formattedDate & " " & quoted form of POSIX path of eachFile
                    set logFile to open for access ((path to desktop folder as text) & "Date Found.txt") as text with write permission
                    write "Original date found for file: " & OriginalDate & " " & eachFile & return to logFile starting at eof
                    close access logFile
                end if
            end if

            if hasDate is false then
                -- get date from file name after first dash
                set nb to ""
                set nameDate to ""
                set fileName to fileName as string
                set savedDelimiters to AppleScript's text item delimiters --save delimiters
                set AppleScript's text item delimiters to {"-"} --split on "-"
                set nb to offset of "-" in fileName
                if nb is not 0 then
                    set AppleScript's text item delimiters to savedDelimiters --restore delimiters
                    set nameDate to characters (nb + 1) thru (nb + 8) of fileName as string
                    set nameDate to nameDate & "1200.00"
                    set cmd1 to "/usr/local/bin/exiftool -datetimeoriginal=" & nameDate & " " & quoted form of POSIX path of eachFile
                    set cmd2 to "/usr/local/bin/exiftool -createdate=" & nameDate & " " & quoted form of POSIX path of eachFile
                end if
                try
                    -- write date from name to EXIF
                    do shell script cmd1
                    do shell script cmd2
                    do shell script "touch -t " & nameDate & " " & quoted form of POSIX path of eachFile
                    do shell script "rm " & quoted form of POSIX path of (eachFile & "_original")
                on error
                    -- if date from name is invalid, log the error
                    set logFile to open for access ((path to desktop folder as text) & "Date Error.txt") as text with write permission
                    write "No valid date found in file name: " & eachFile & return to logFile starting at eof
                    close access logFile
                end try
            end if
        end repeat

        -- process folders:
        set folderList to folders of aFolder
        repeat with eachSubfolder in folderList
            -- process a subfolder
            my processFolder(eachSubfolder)
        end repeat
    end tell
end processFolder

tell application "Finder"
    display dialog "Done! All files processed." buttons {"Close"}
end tell
Link to this FAQ: https://faq.infomaniak.com/2515
Has this FAQ been helpful?