Knowledge base
1000 FAQs, 500 tutorials and instructional videos. Here, there are only solutions!
Manage the device folders to be synchronized with kDrive
This guide explains how to select one or more additional folders that will be uploaded and synchronized from the desktop app (desktop application on macOS / Windows / Linux) to the Web kDrive app (online service ksuite.infomaniak.com/kdrive), a process called “advanced synchronization”.
Introduction
- Advanced synchronization can have its own Lite Sync configuration, independent of the settings applied to the rest of the standard synchronization:
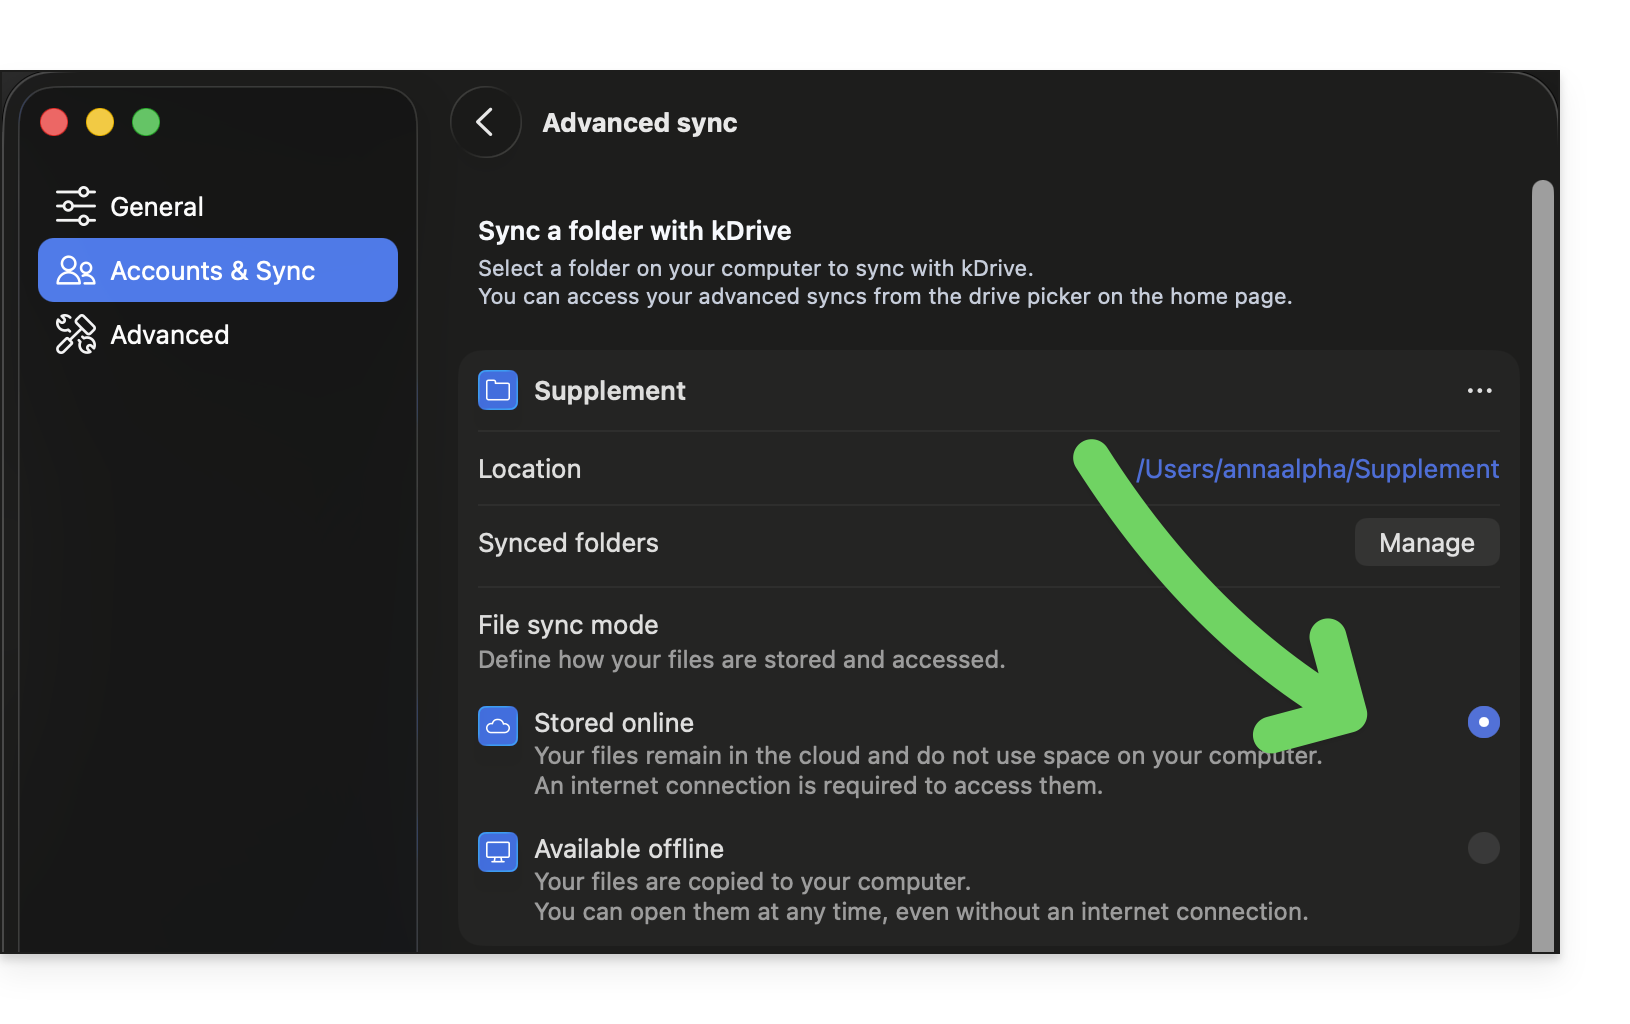
- Note that once an advanced synchronization is configured, the folder containing your new synchronization (advanced synchronization) belongs to you and will not be shared automatically, even if it is created in the organization's folders.
- It is, however, preferable to centralize everything in the "official"
/kdrive(or/kdrive2, etc.) folder rather than distributing your files in different locations. - And be careful not to create duplicates, which could take up unnecessary space and complicate the organization of your files (❓: help).
Choose an additional folder to synchronize with kDrive
Prerequisites
- Have a kDrive / kSuite plan.
- Have the kDrive application on the device to be synchronized.
By default, when you install the kDrive application on your device, everything that is already in (and belongs to you) on the kDrive web app (online service ksuite.infomaniak.com/kdrive) will be transferred and visible on the device in a /kdrive (or /kdrive2, etc.) folder; and everything in /kdrive (or /kdrive2, etc.) will be transferred to the web version of kDrive.
However, you can instruct the kDrive app on your device to access other folders (on the computer's hard drive, for example) outside the standard /kdrive (or /kdrive2, etc.) directory structure, so that they are also synchronized and sent to Infomaniak's servers.
Desktop app v4.x
To add a local folder for advanced synchronization:
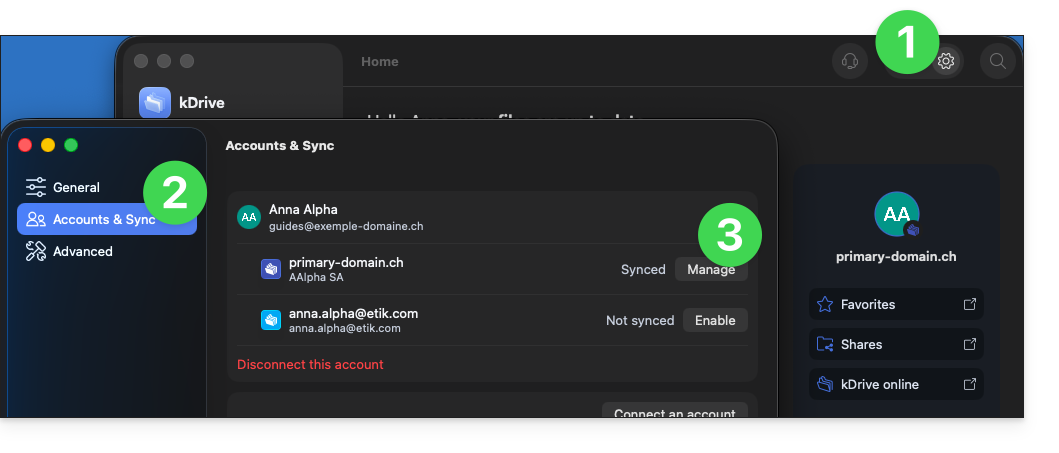
- Open the kDrive application on your computer and click on the Settings icon in the top right corner.
- Click on Accounts & Synchronization.
- Click on Manage to the right of the current synchronization:
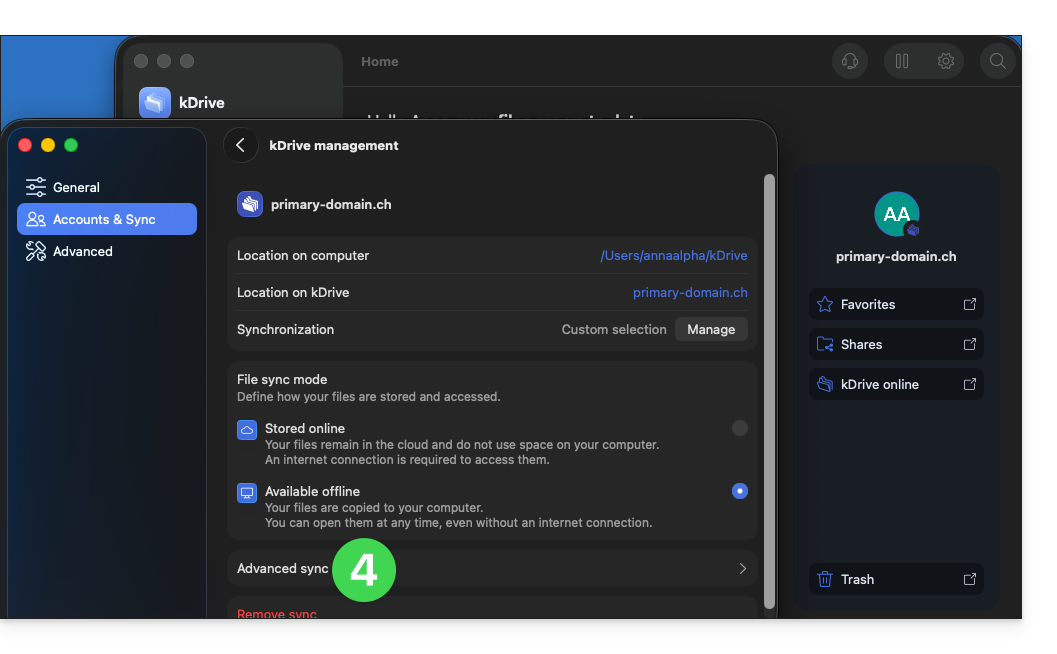
- Click on Advanced Synchronization:
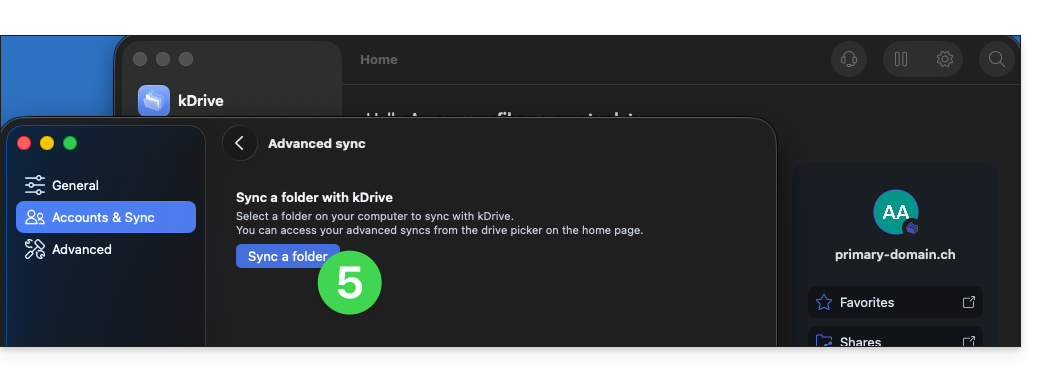
- Click on Synchronize a folder:
- Click the button to Select a folder:
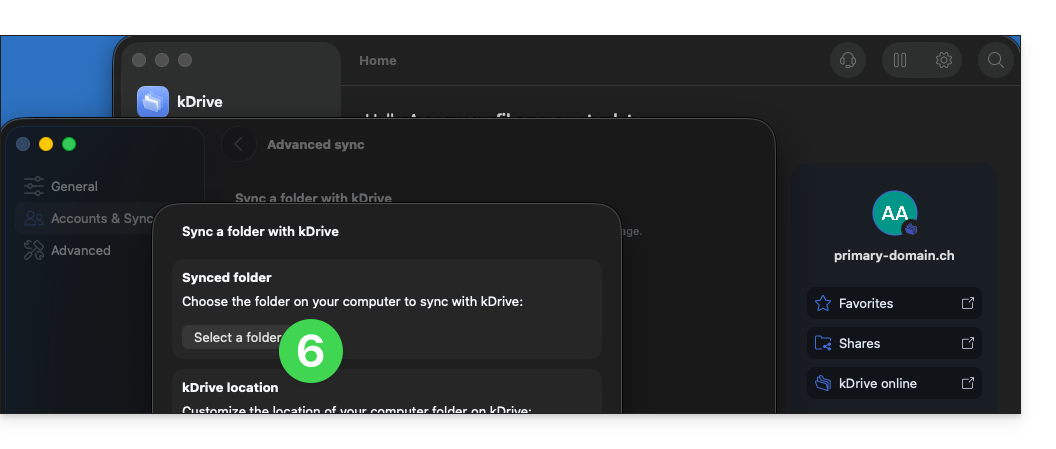
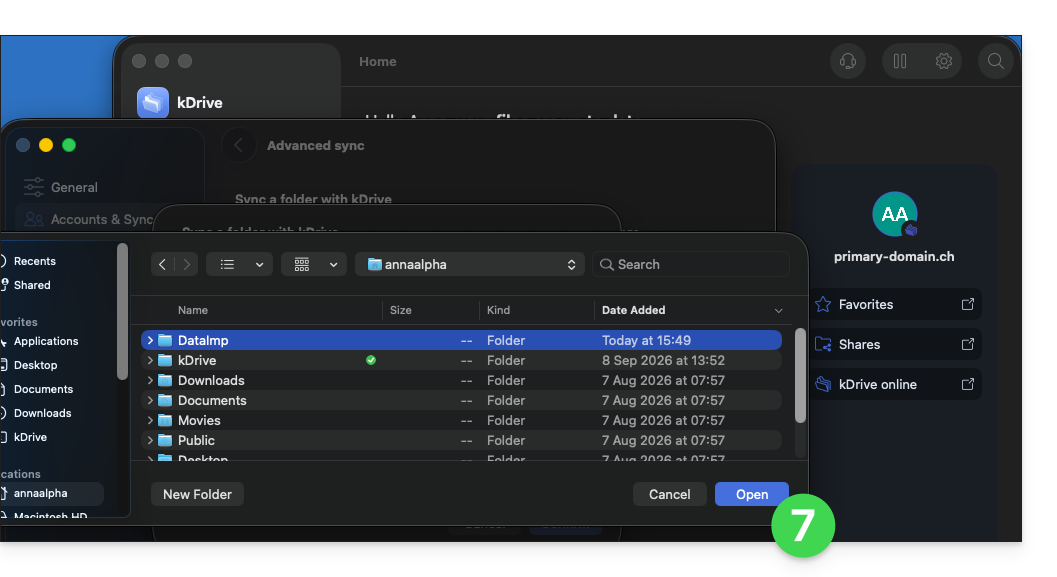
- Find and select the additional folder (outside your existing and already synchronized kDrive structure) and then click Open:
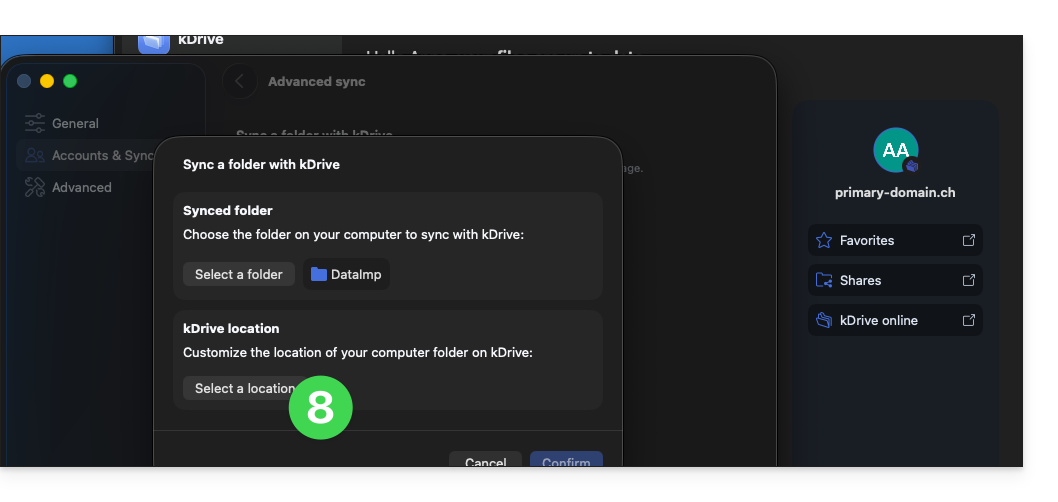
- Then click to choose the location in kDrive Web where the selected additional folder should be sent:
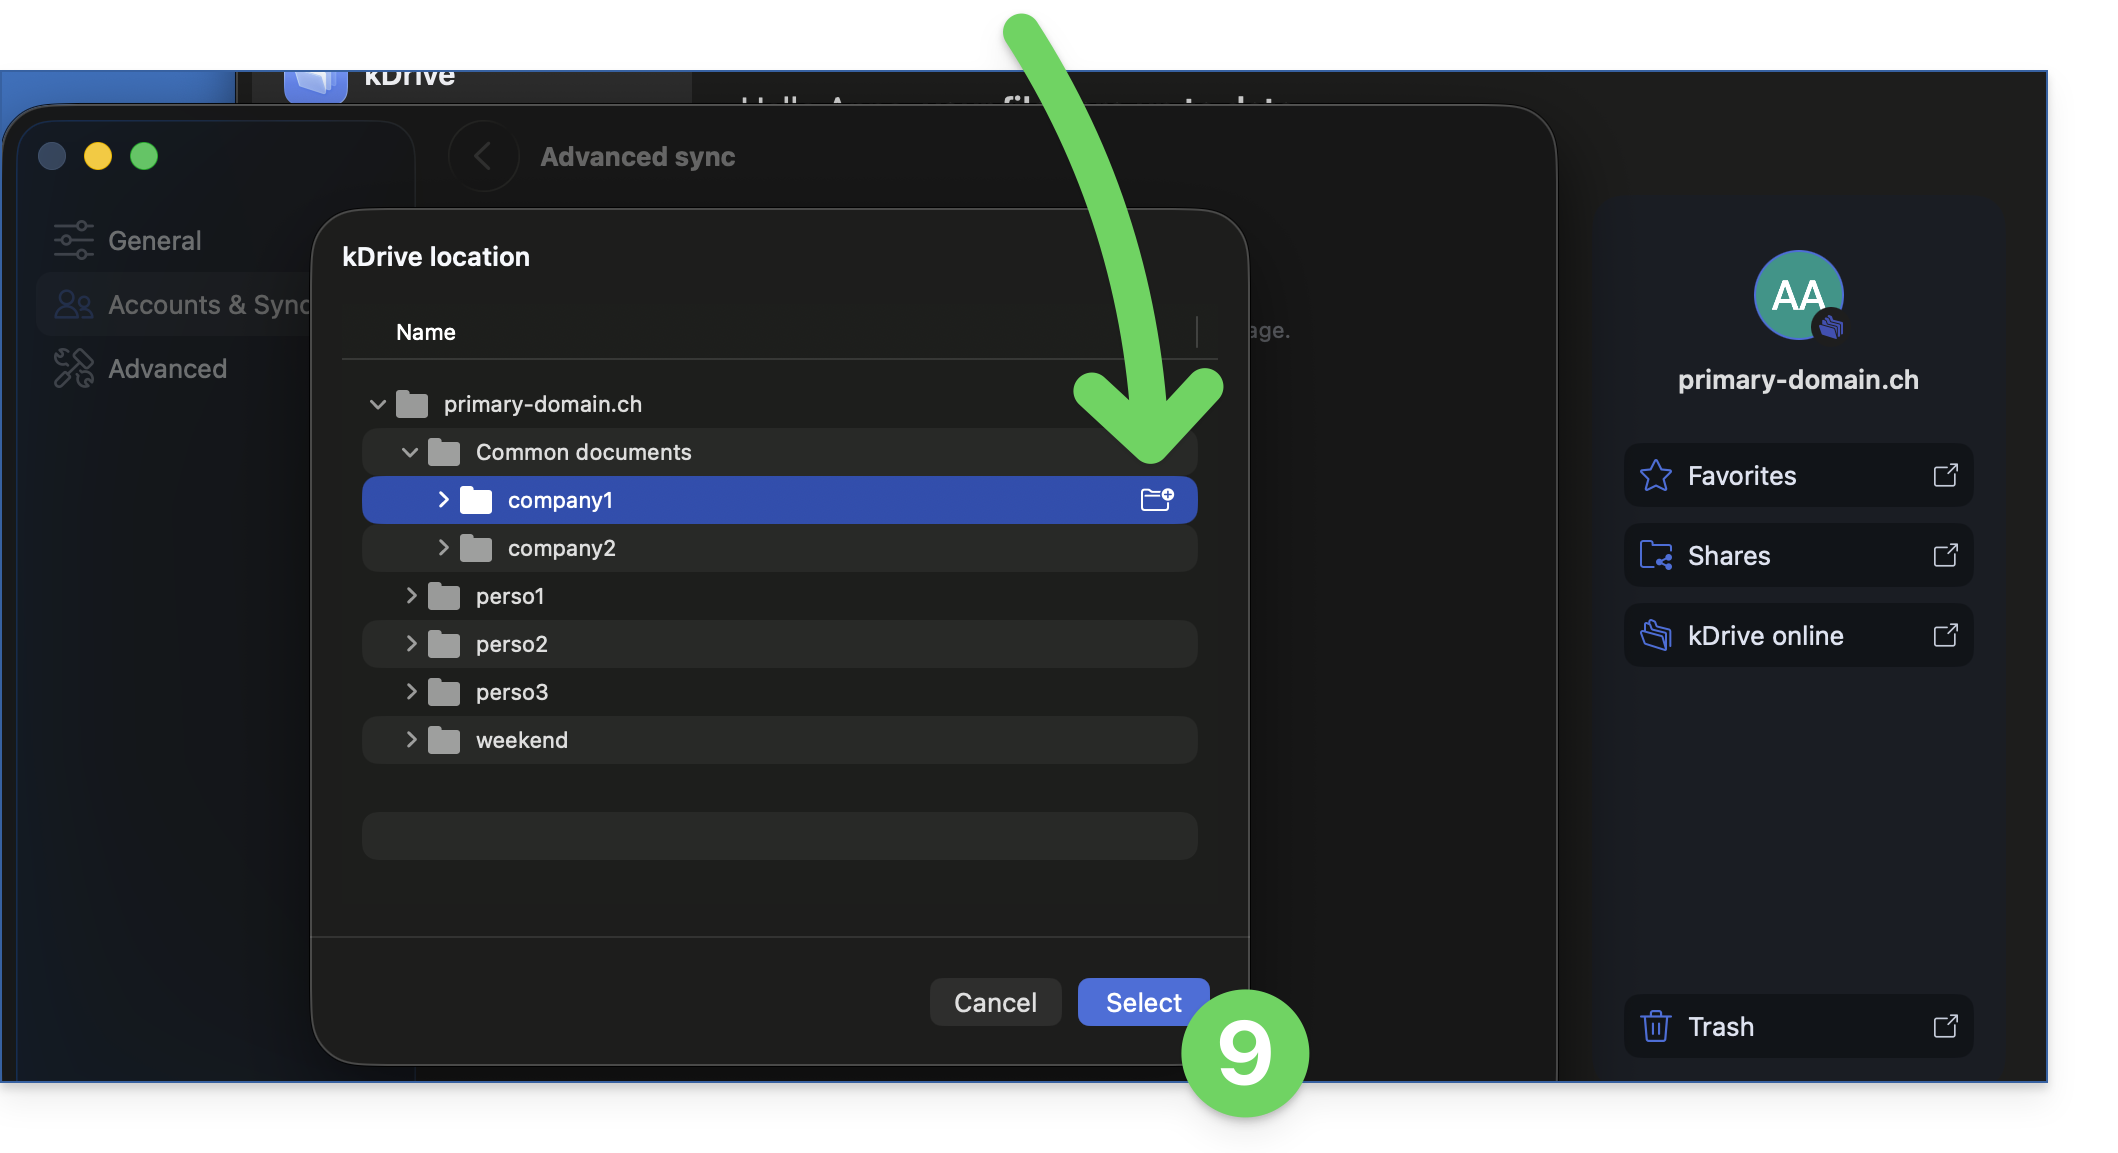
- Find the destination location to use – it is recommended to create a new folder (❓: help) – then click Select:
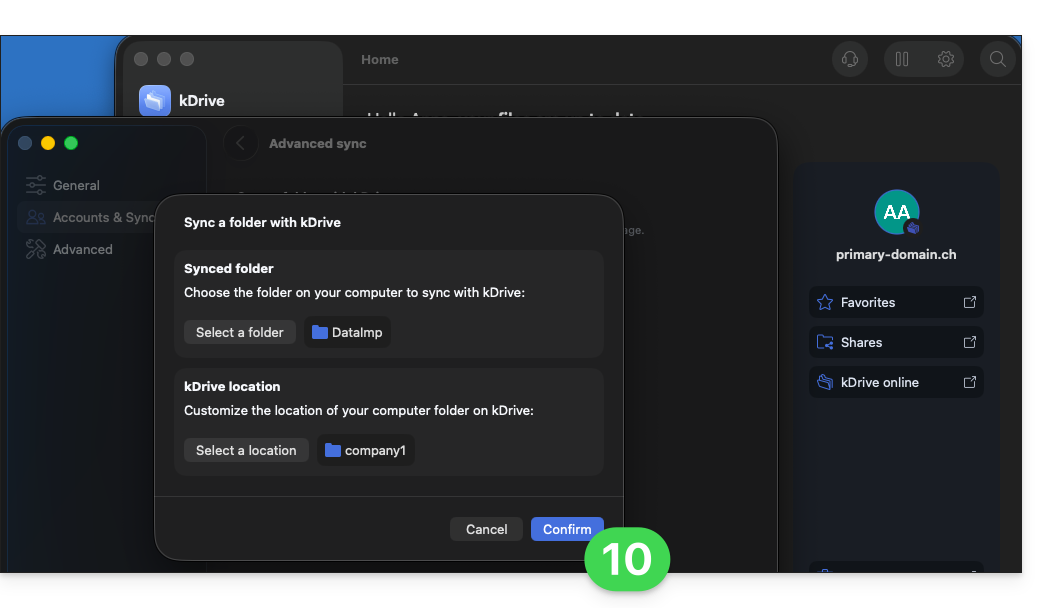
- Confirm your selections:
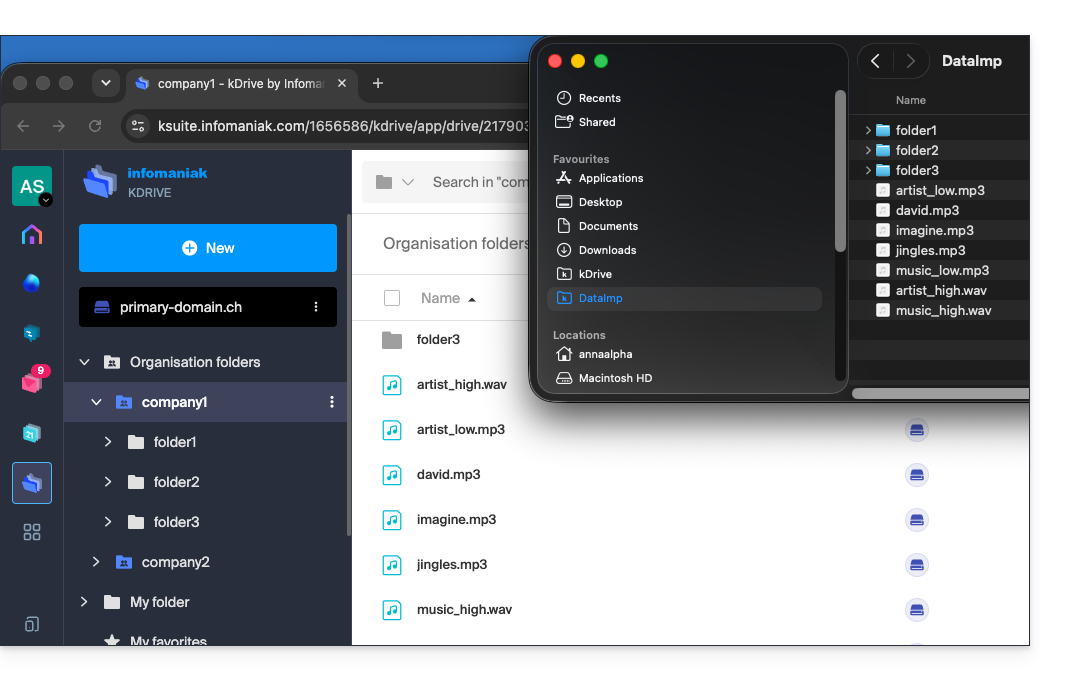
- That's it, the additional data is sent to the specified location and synchronized across your devices:
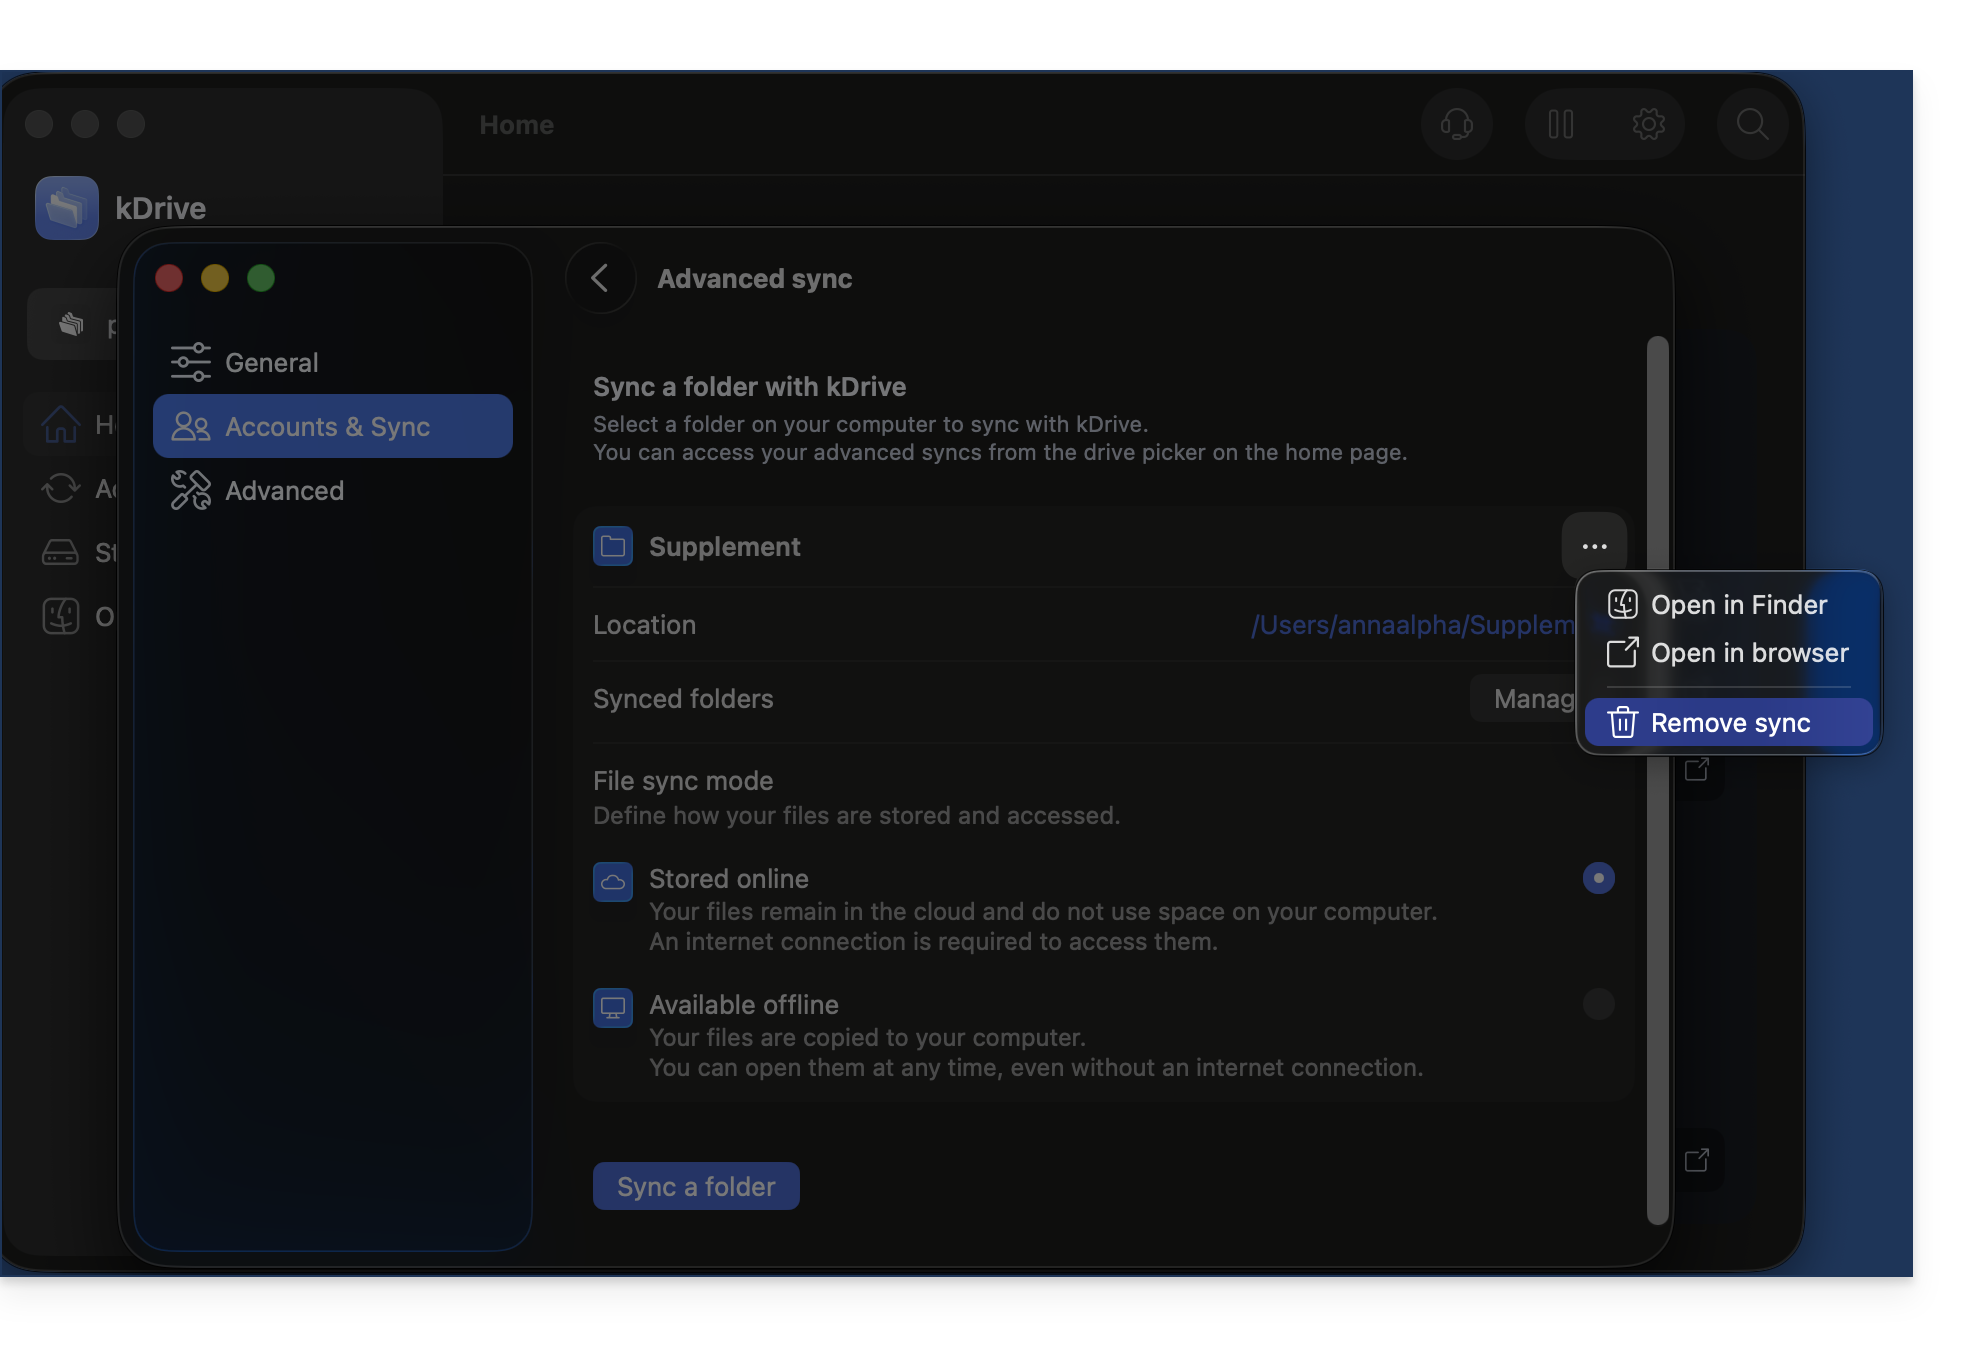
To stop and remove an advanced synchronization:
- In the same location accessible using the procedure above, click on the ••• icon on the far right:
Desktop app v3.x
To add a local folder for advanced synchronization:
- Left-click on the desktop app icon in the notification area of your computer (top right on macOS, bottom right on Windows, and double-left-click in the taskbar on Linux).
- Click on the action menu ⋮ on the right of the window that appears.
- Click on kDrive Settings.
- Click on the chevron to the left of your synchronization name to display the list of folders (currently stored on kDrive Web).
- Expand the contents of the listed folders as needed and check / uncheck the folders to be synchronized with your computer.
- Click the blue Validate button.
- Click on Synchronize a local folder.
- … which will allow you to synchronize one or more new folders from your hard drive with the location of your choice on kDrive.
To stop and remove a synchronization:
- In the same location accessible using the procedure above, click on the ⋮ icon on the far right:
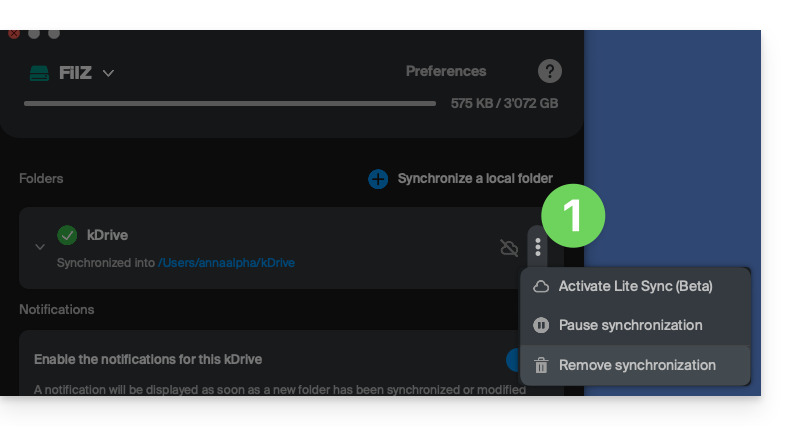
- … which will allow you to:
- Enable Lite Sync
- Pause synchronization
- Delete synchronization (only from your device, without affecting your kDrive) - see this other guide.
Avoid duplicates during advanced synchronization (v4.x)
When creating an advanced synchronization and choosing its destination, create a new folder specifically for this purpose from the location selection window on kDrive: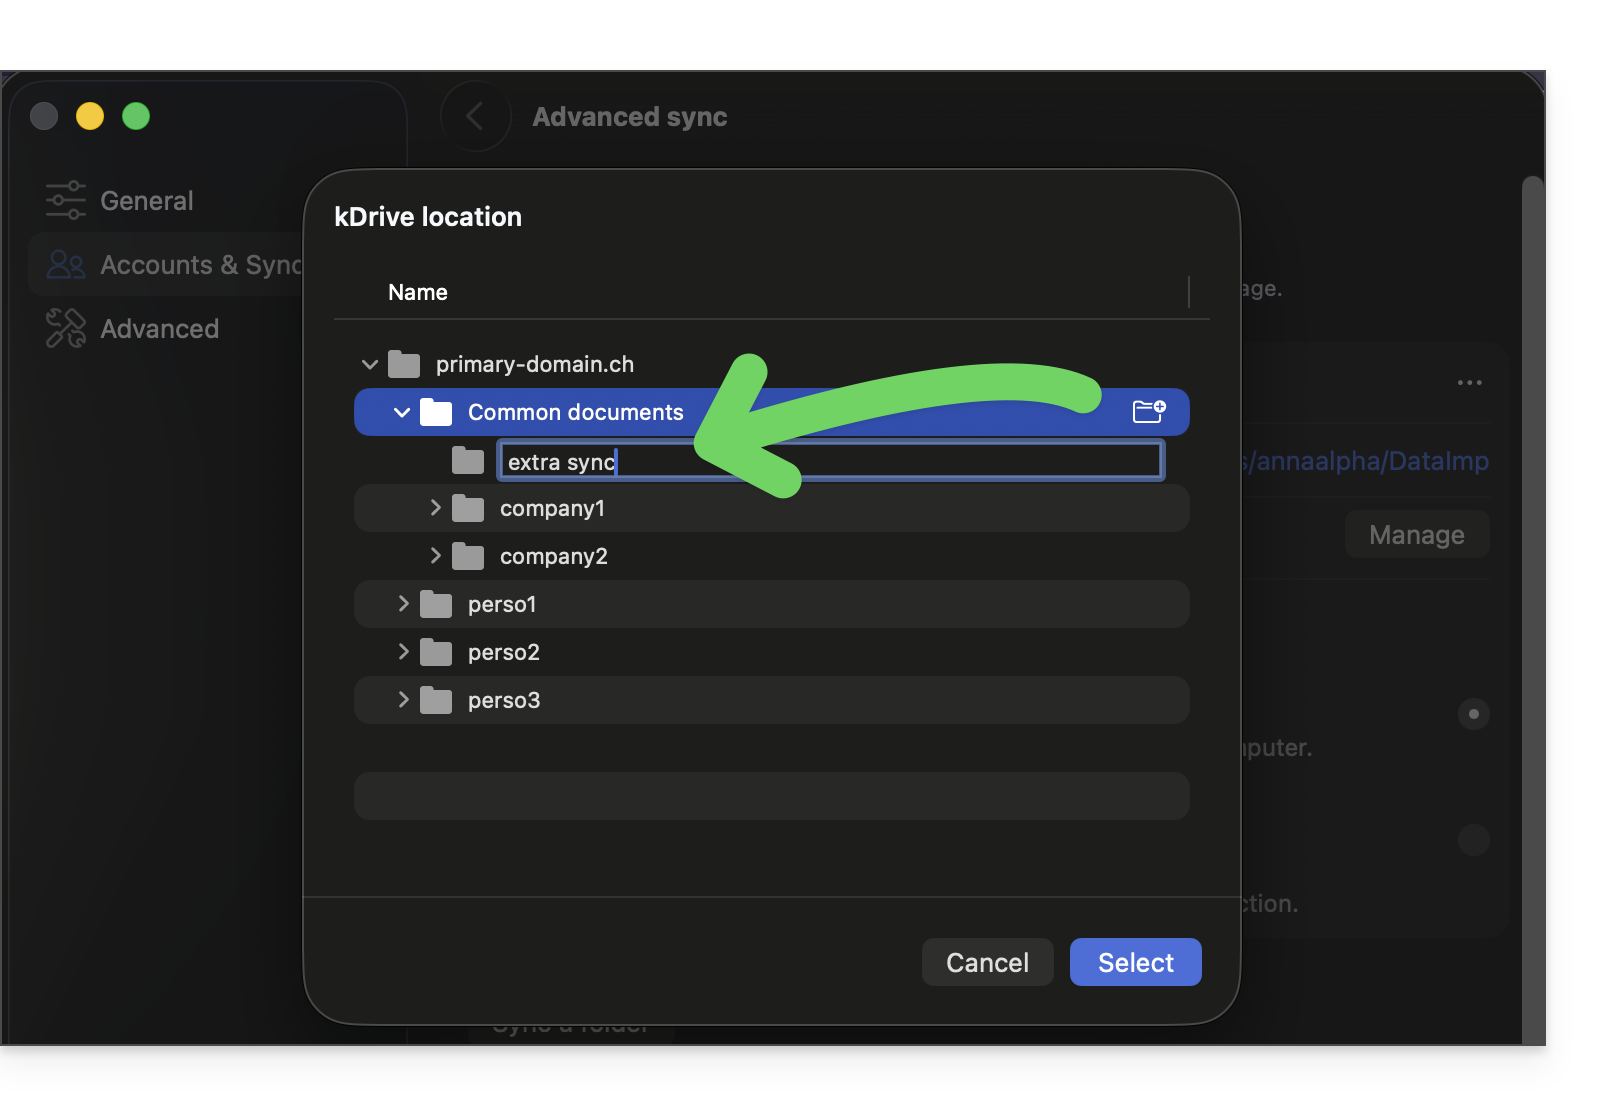
Select it. The folder created in this way will be automatically excluded from any other existing synchronization on kDrive, to avoid duplicate data: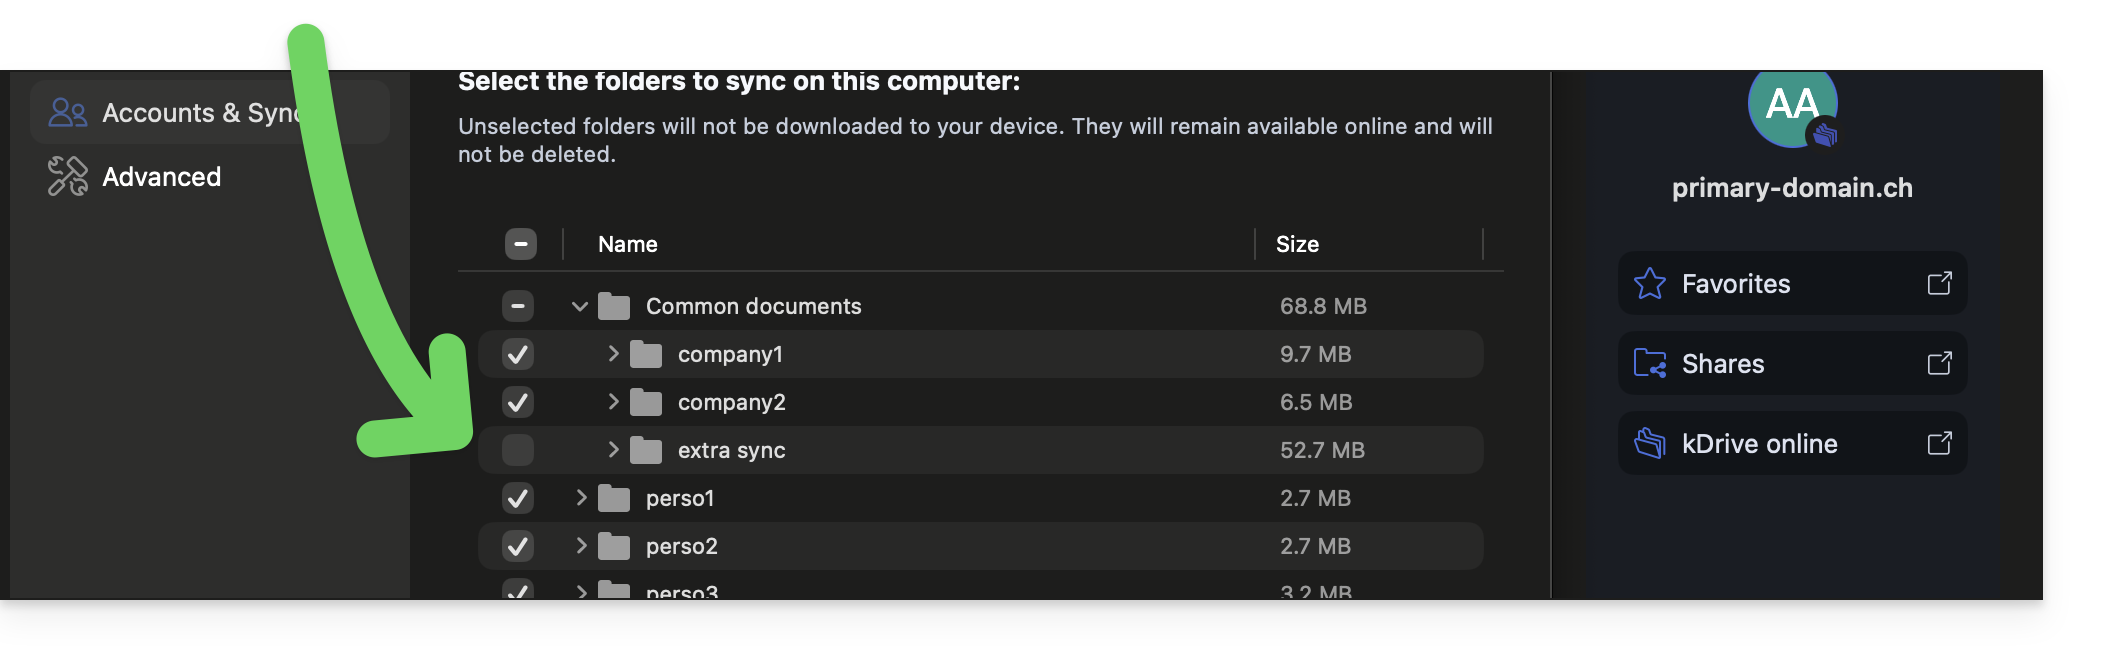
If you have not created a new folder using this method, then it is recommended tomanually exclude your advanced synchronizationotherwise, it will be double-synchronized through the usual synchronization process (since the files are now part of the kDrive file structure).
To do this:
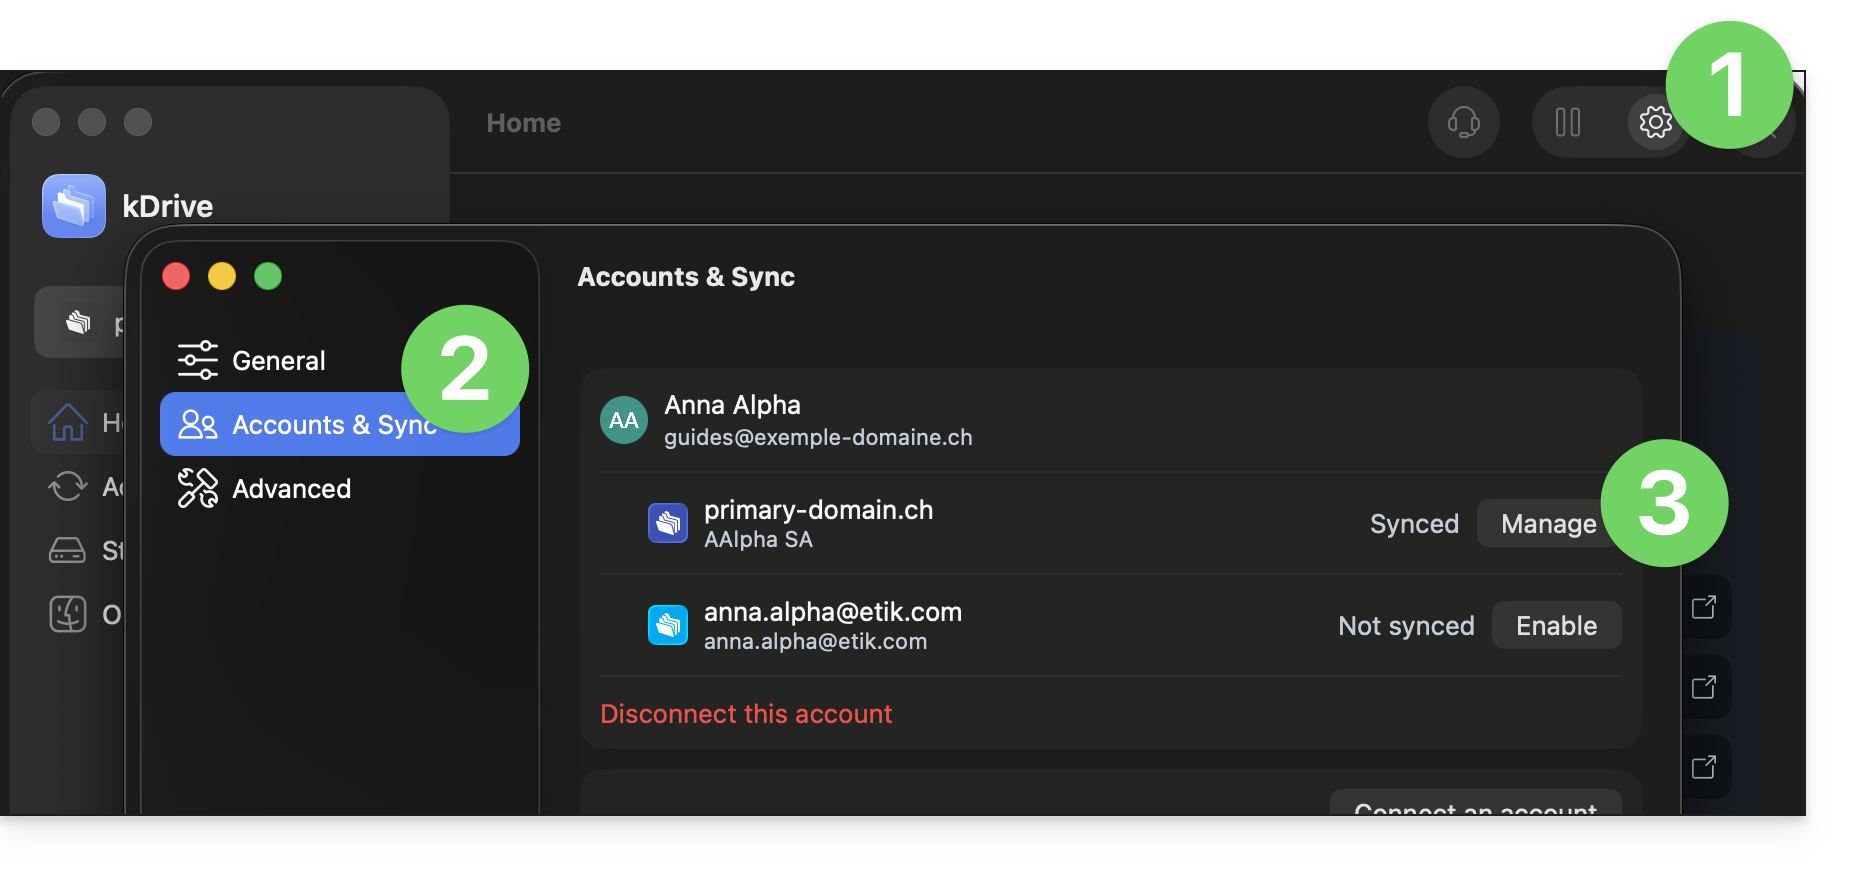
- Click on the Settings icon in the top right corner on macOS.
- Click on Accounts & Sync.
- Click on Manage to the right of the current synchronization:
- Click on Manage synchronization:
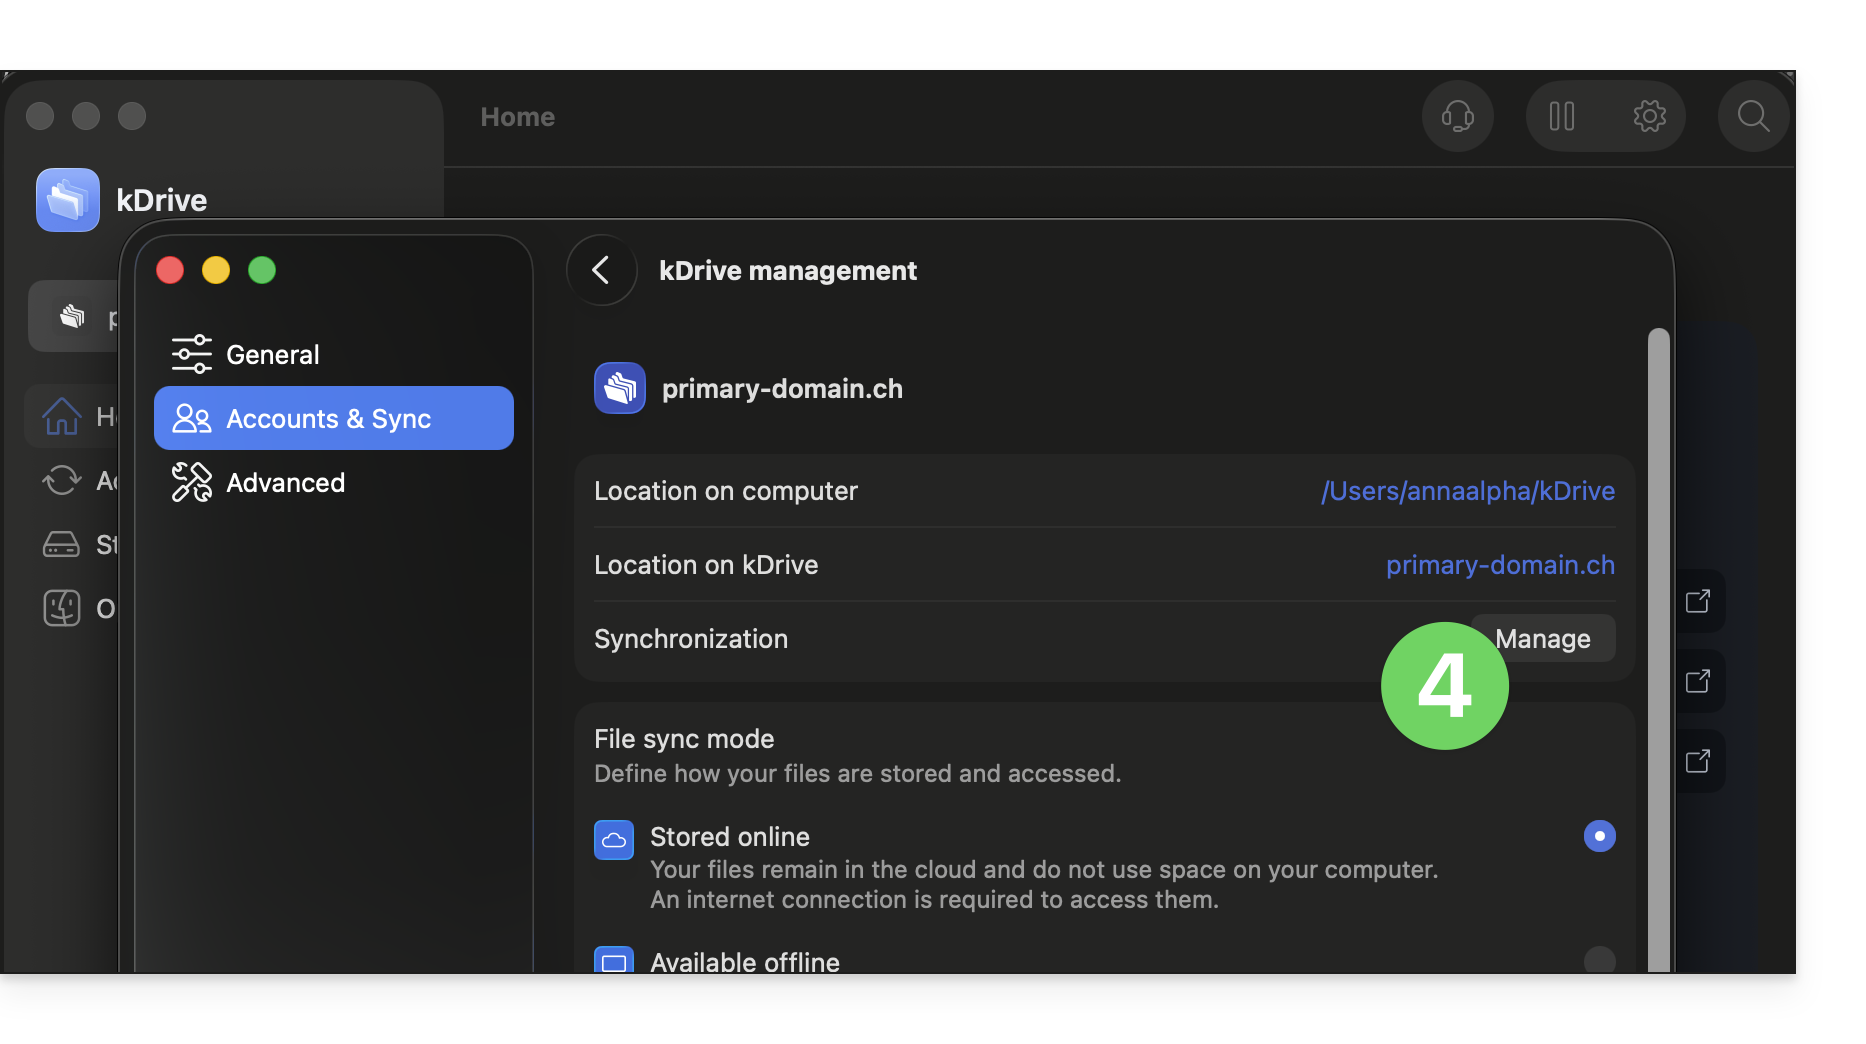
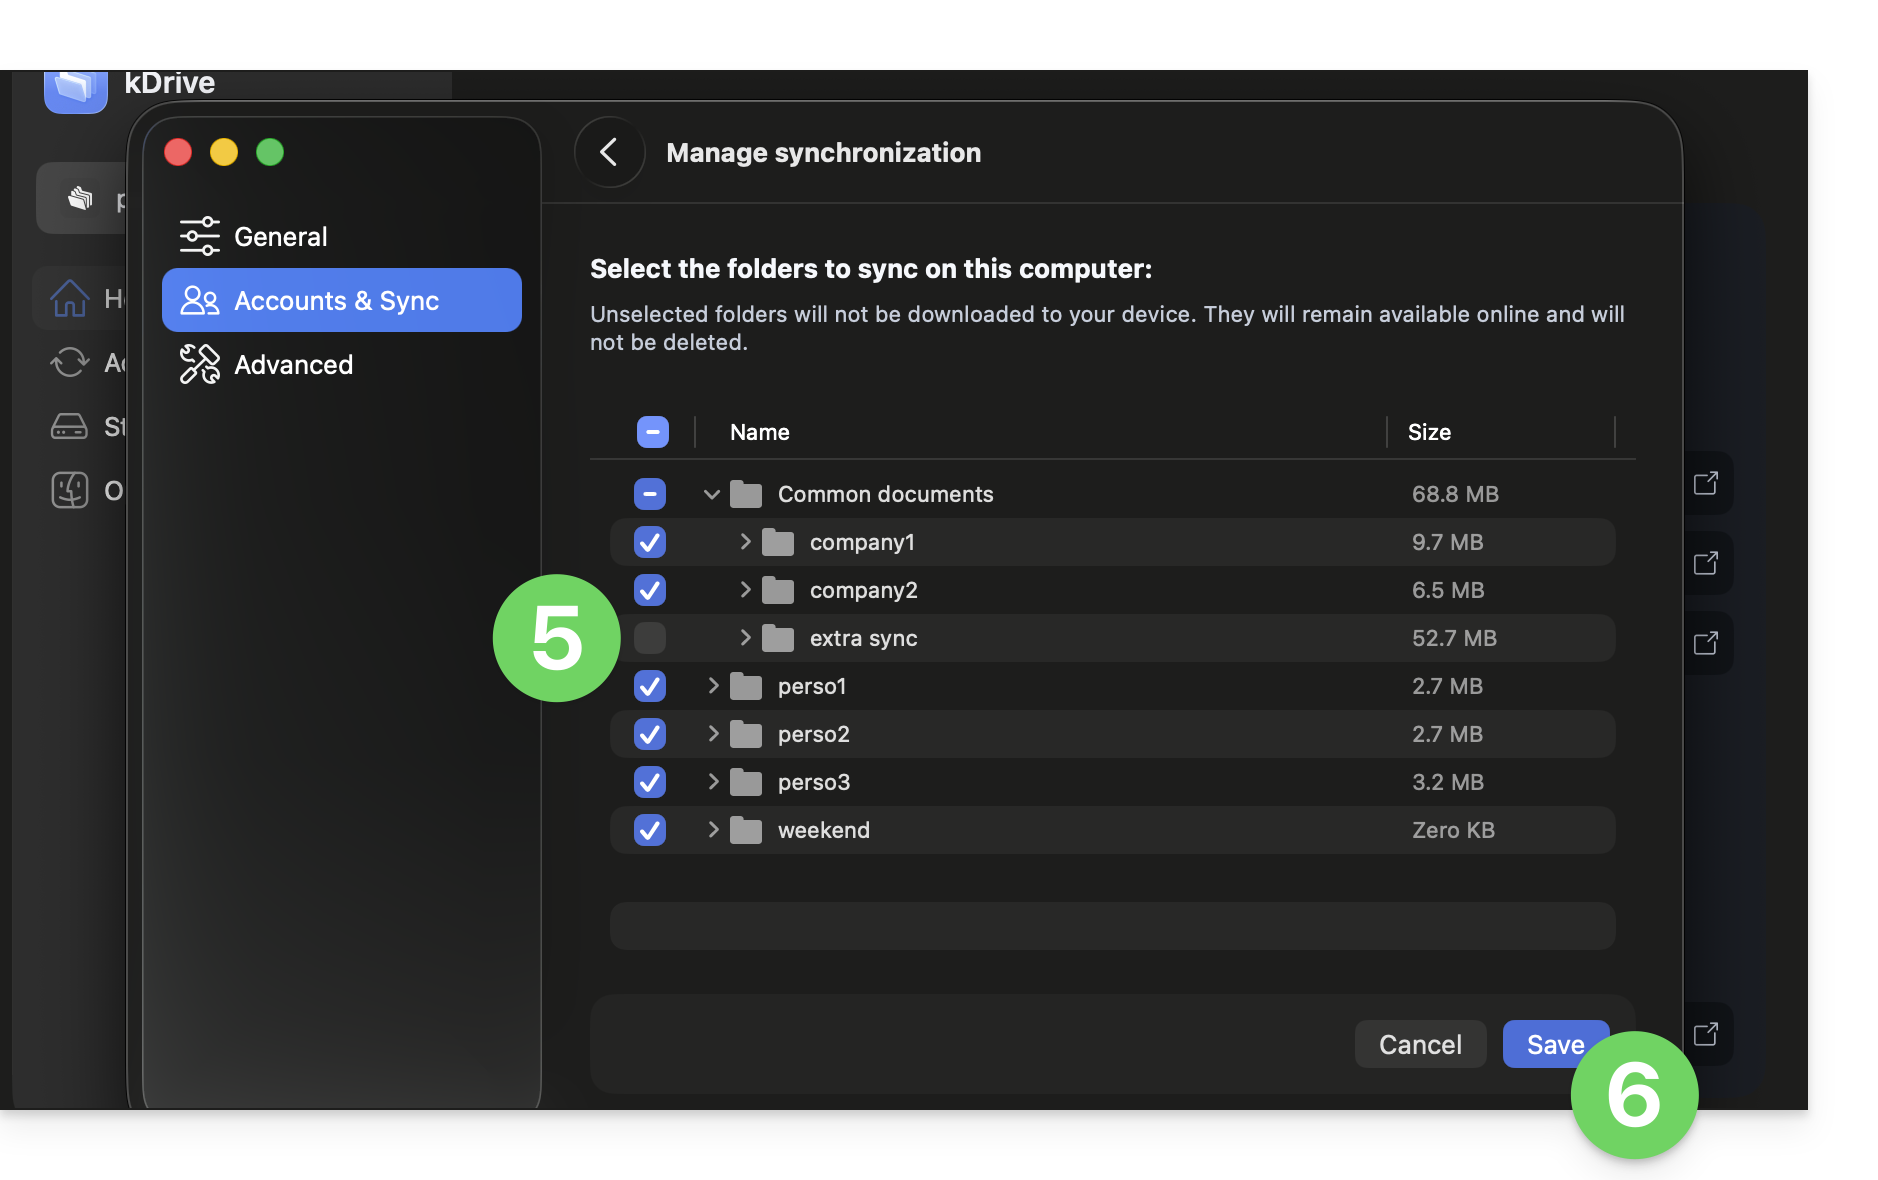
- Enable or disable the checkboxes corresponding to the data that should no longer appear on your device after the next synchronization.
- Save your changes:
Link to this FAQ: https://faq.infomaniak.com/2510
Has this FAQ been helpful?