Knowledge base
1000 FAQs, 500 tutorials and instructional videos. Here, there are only solutions!
Schedule tasks on your web hosting
Update 09/14/2026
This guide concerns the task scheduler on Web Hosting.
Introduction
- This scheduling feature allows you to run scripts and code at the time and frequency you choose, to automate repetitive tasks.
- If your site uses Node.js, you can also manage scheduled tasks directly in your application's code using the
node-cronmodule. - Refer to this other guide if you are looking for information about crontab (crons via SSH) on Cloud Server.
Access the task scheduler (webcron)
To access the task scheduling tool:
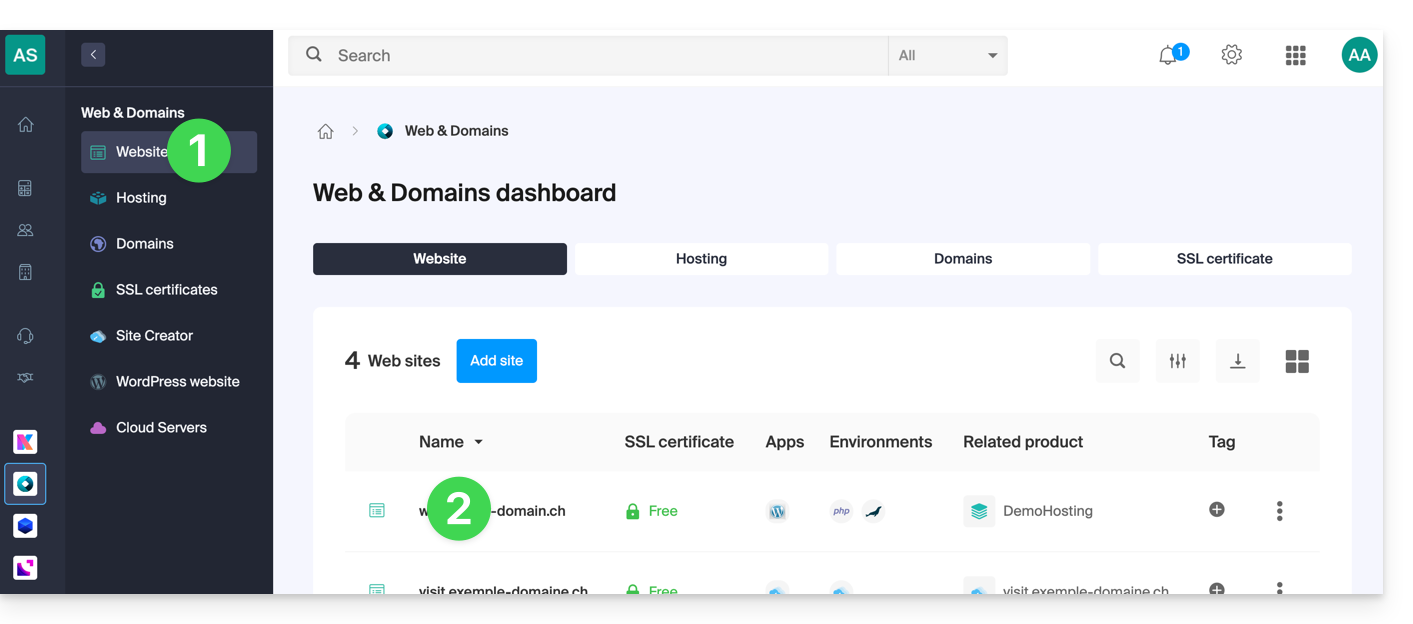
- Click here to access your website management in the Infomaniak Manager (need help?).
- Click directly on the name assigned to the site in question:
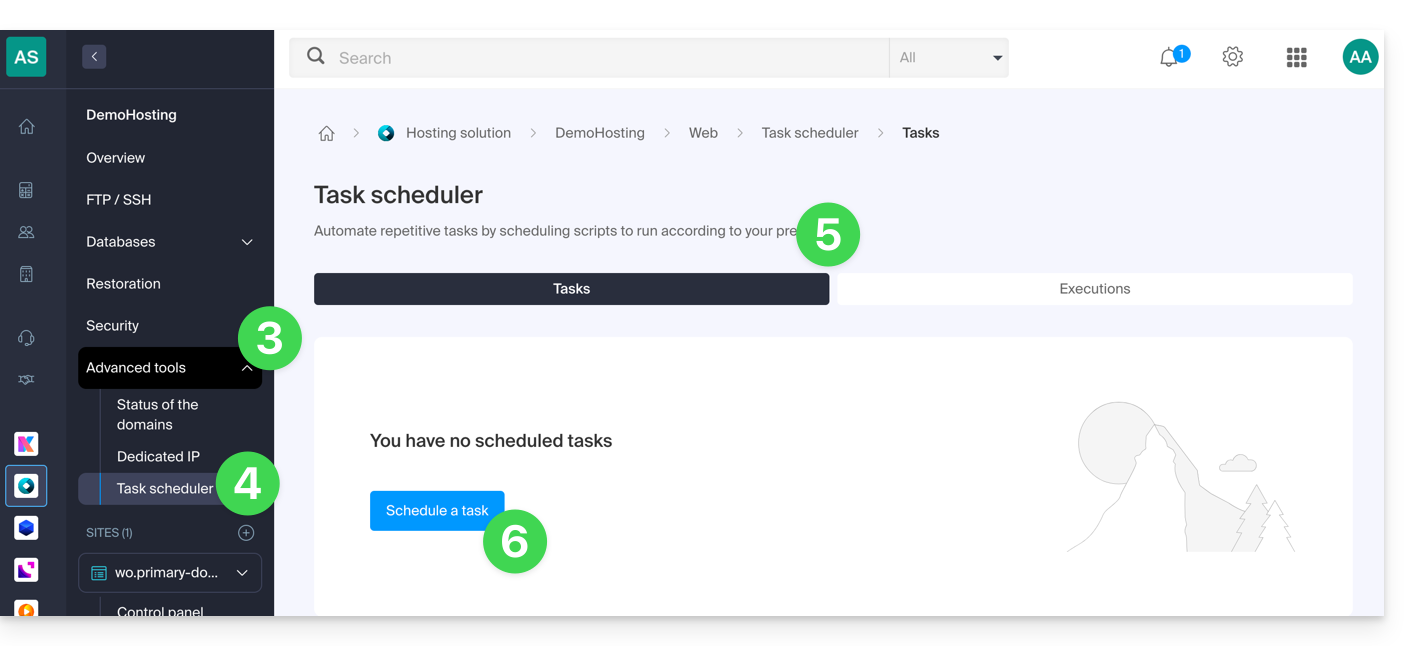
- Click on Advanced Tools in the left-hand menu.
- Click on Task Scheduler.
- Existing cron jobs and tasks currently running are displayed under the two tabs on the page.
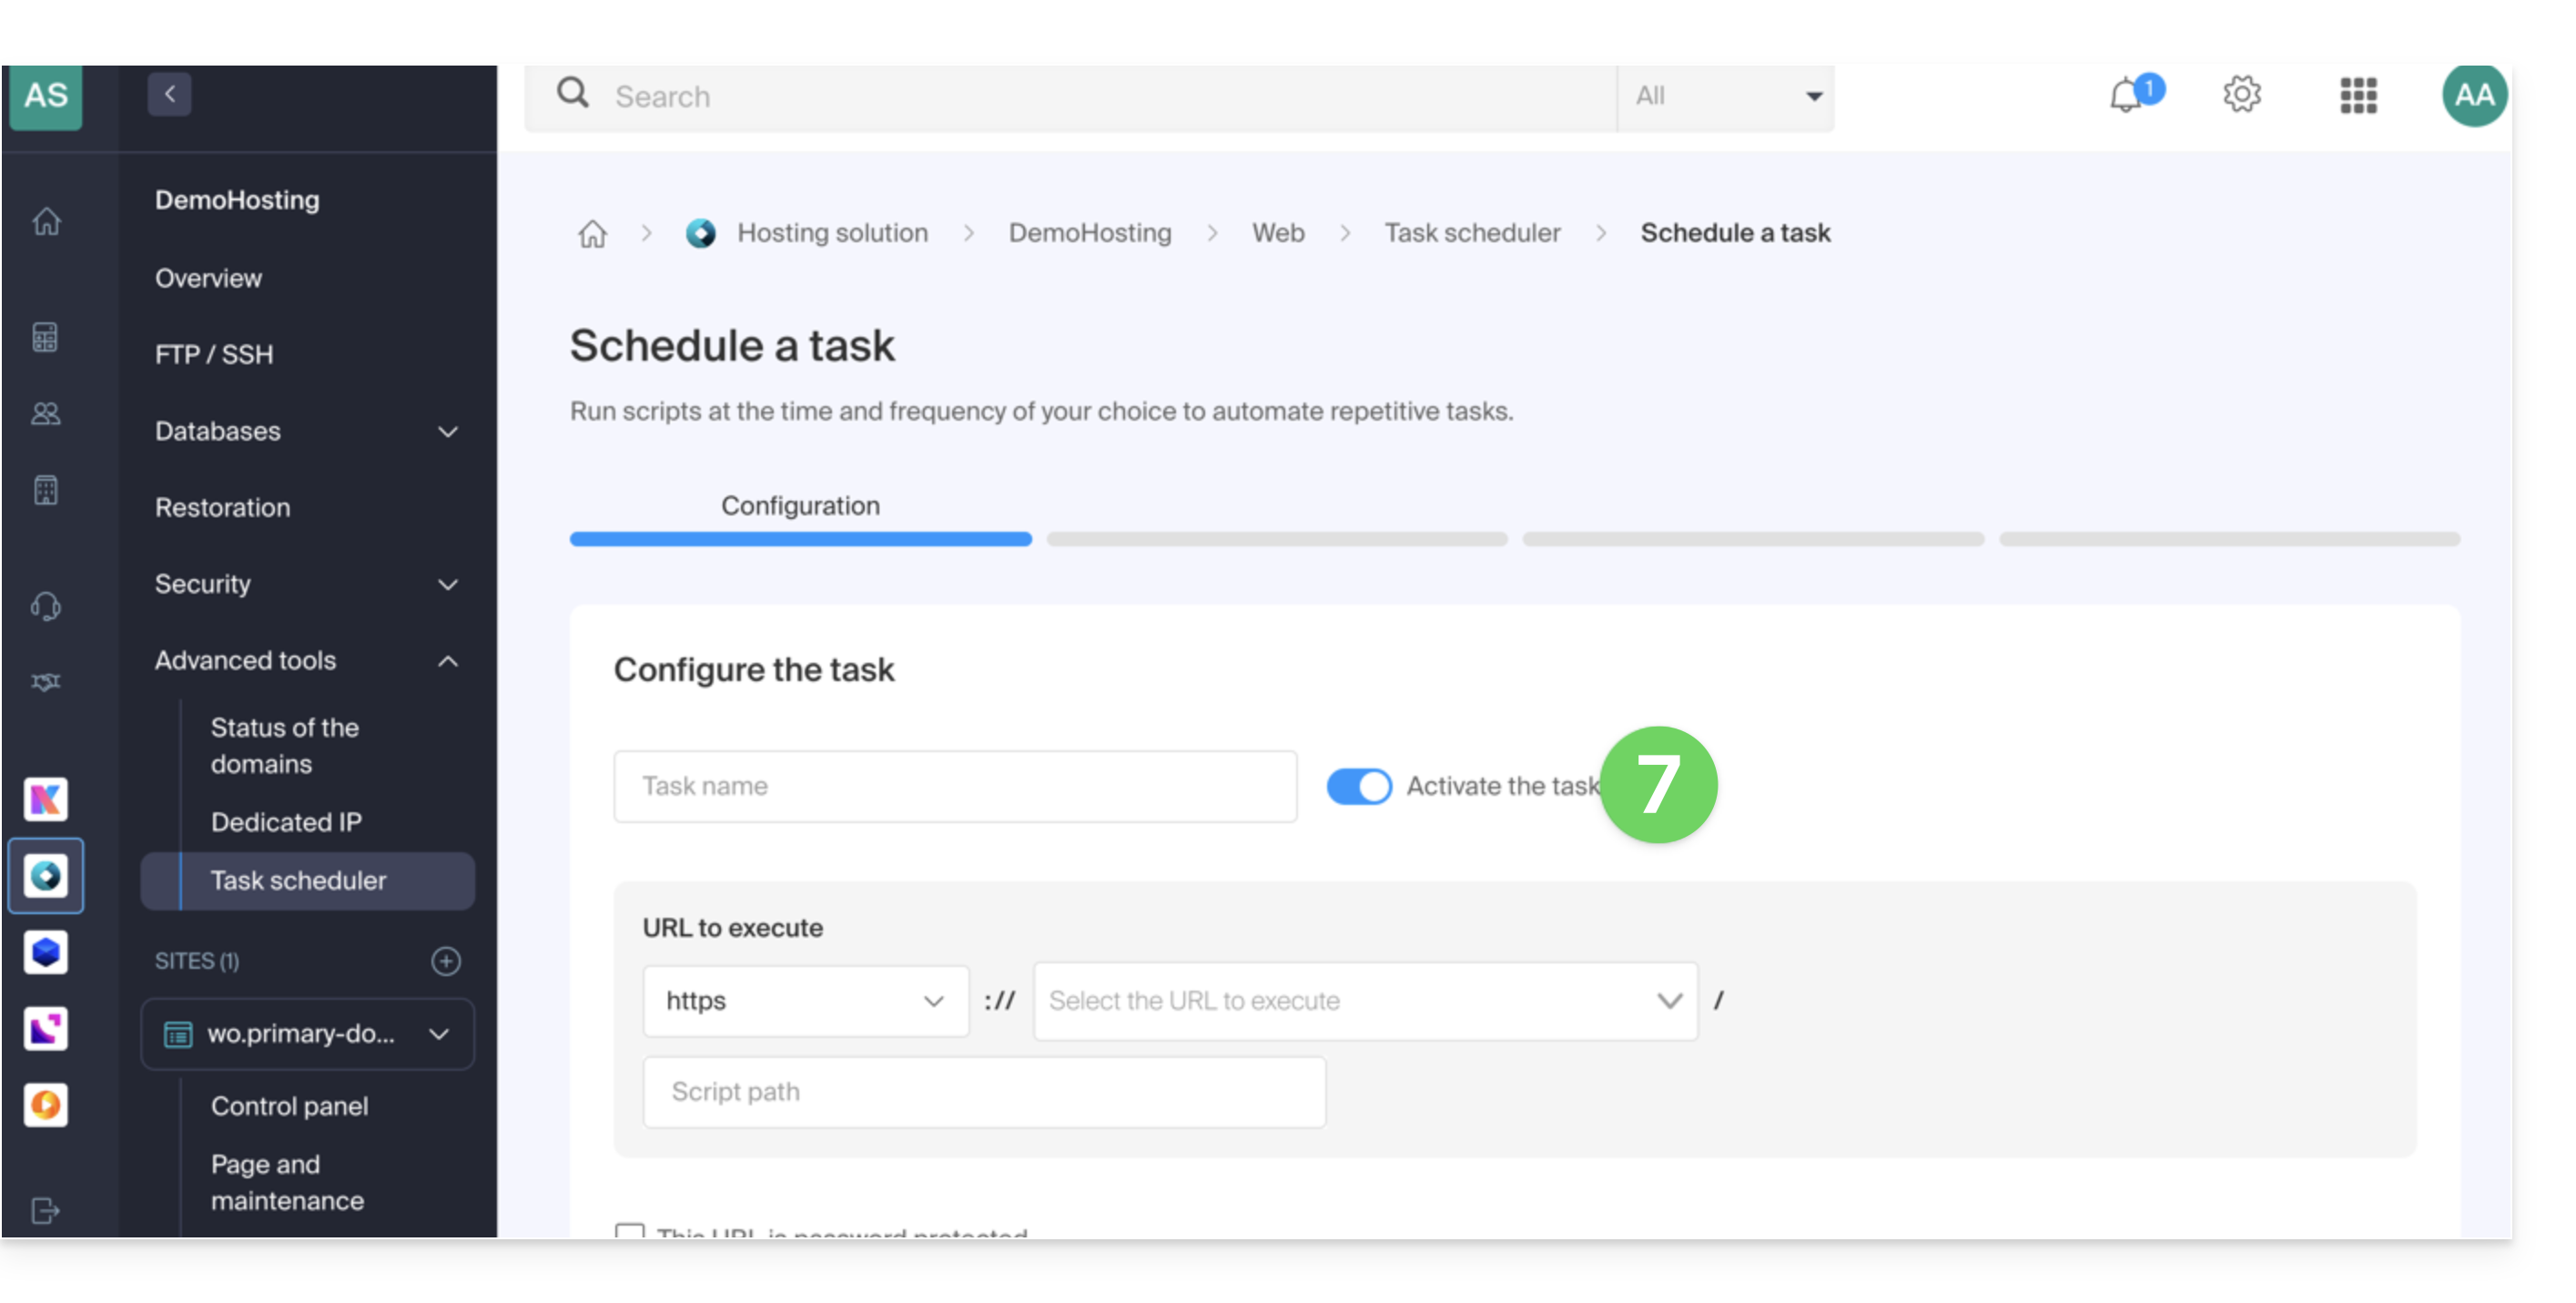
- Click on the Schedule a task button to create a scheduled task, specifying whether the URL of the script to be executed is password-protected, whether you want to receive notifications, and of course the desired interval (see below), etc.:
- Don't forget to activate the task using the toggle switch:
Minimum intervals
In the next step, you can schedule the cron according to…
- [ a ]… predefined intervals, such as once a week…
- [ b ]… or a custom interval with a minimum frequency of:
- 15 minutes with shared hosting
- 1 minute on Cloud Server
Notifications & analysis
In the next step, you can enable notification emails: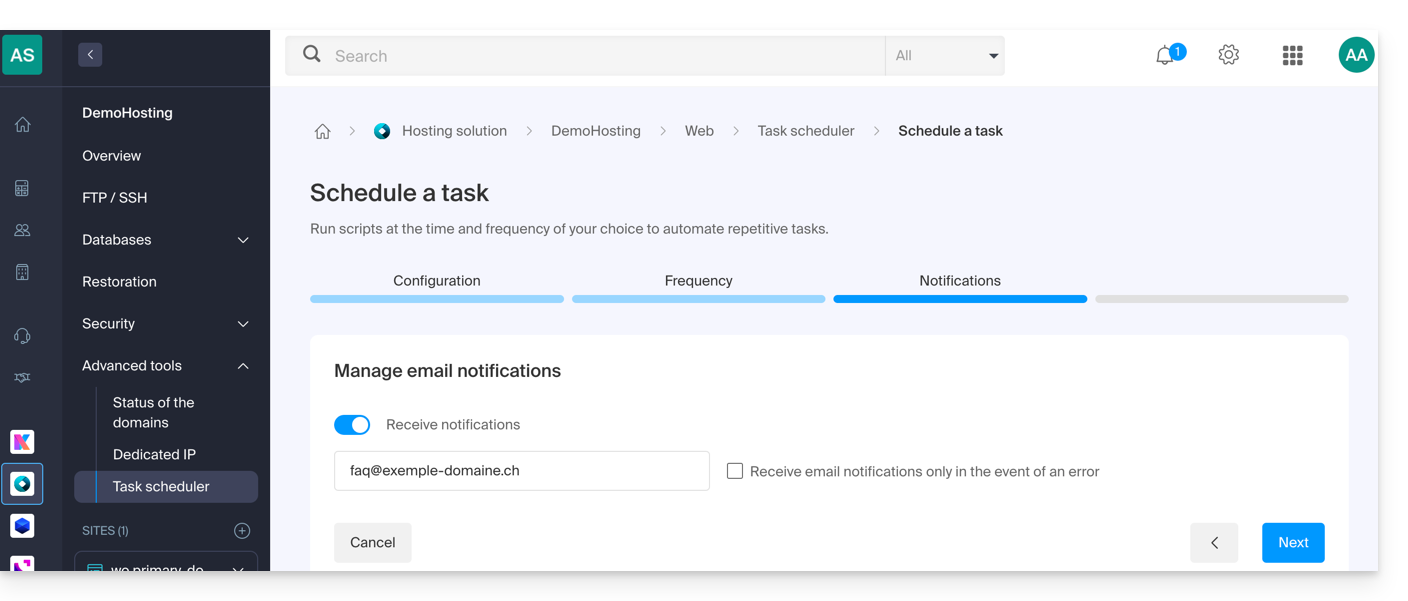
The next step allows you to enable task analysis: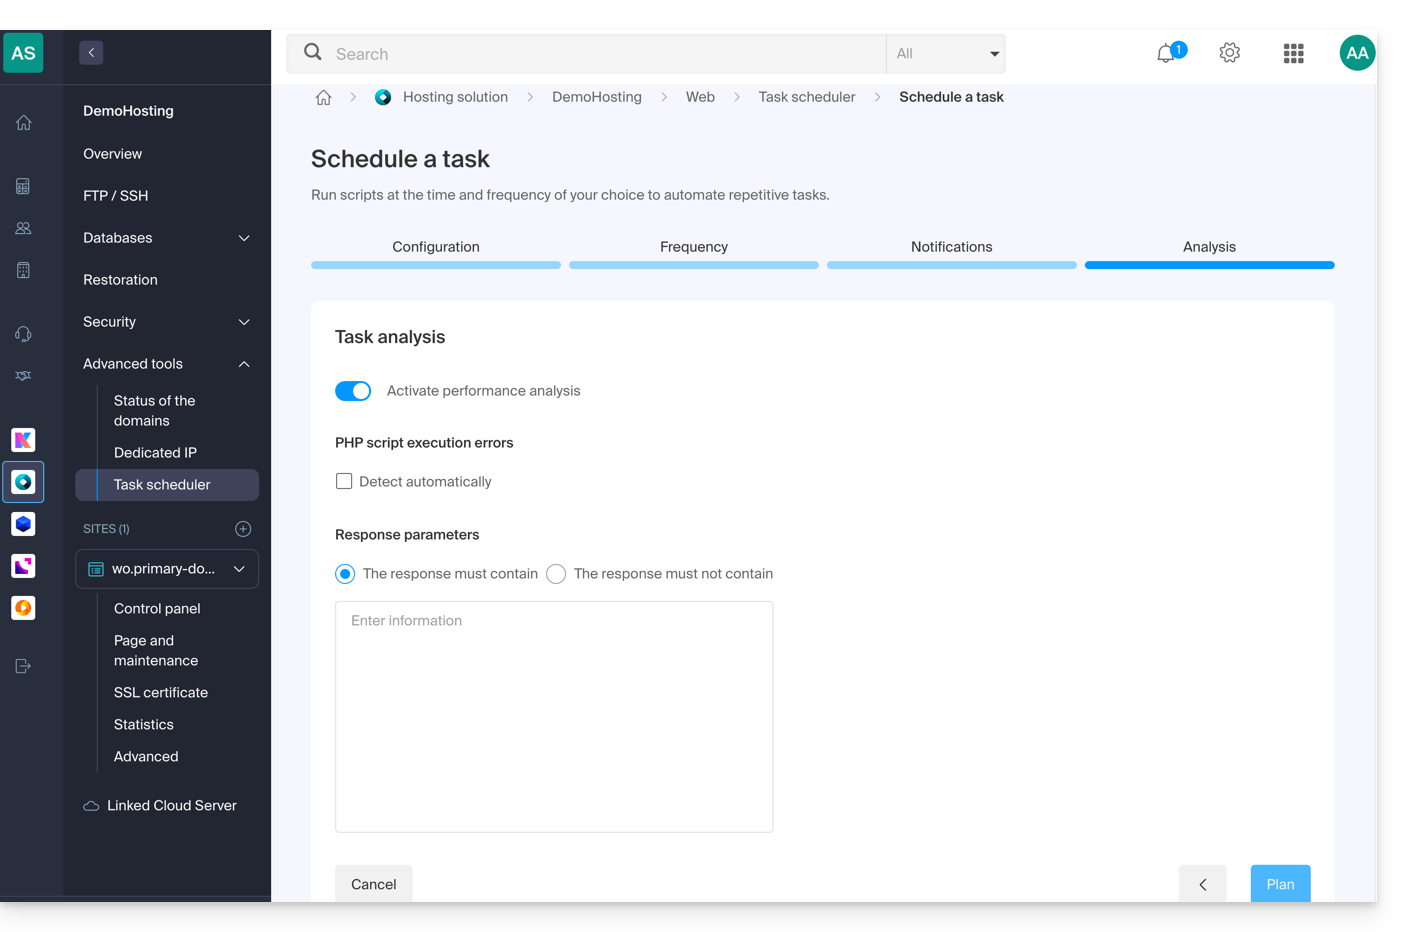
Run the task manually once
Once the task is created, click on the action menu ⋮ located to the right of the item in question to access the quick management of your task and its execution log: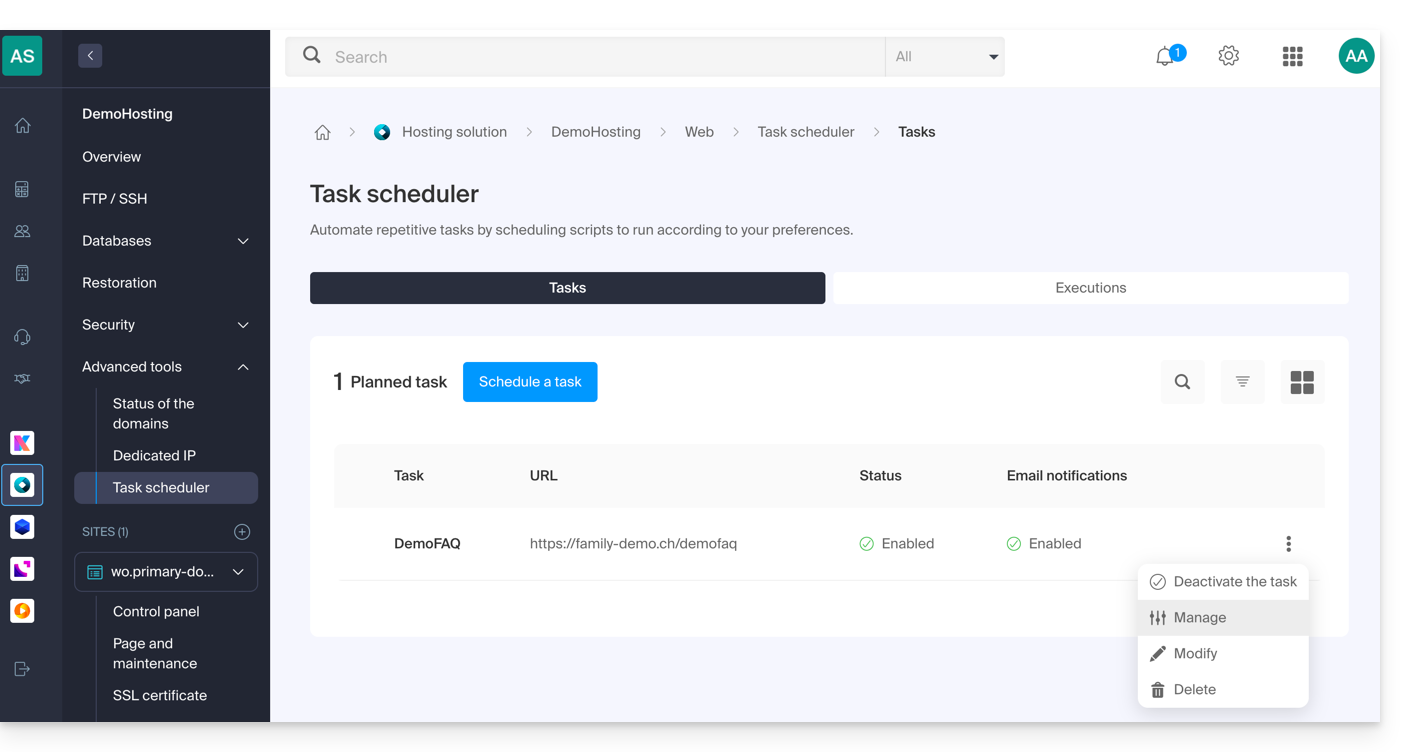
At the top of the page, you can click on the button to execute the task manually once: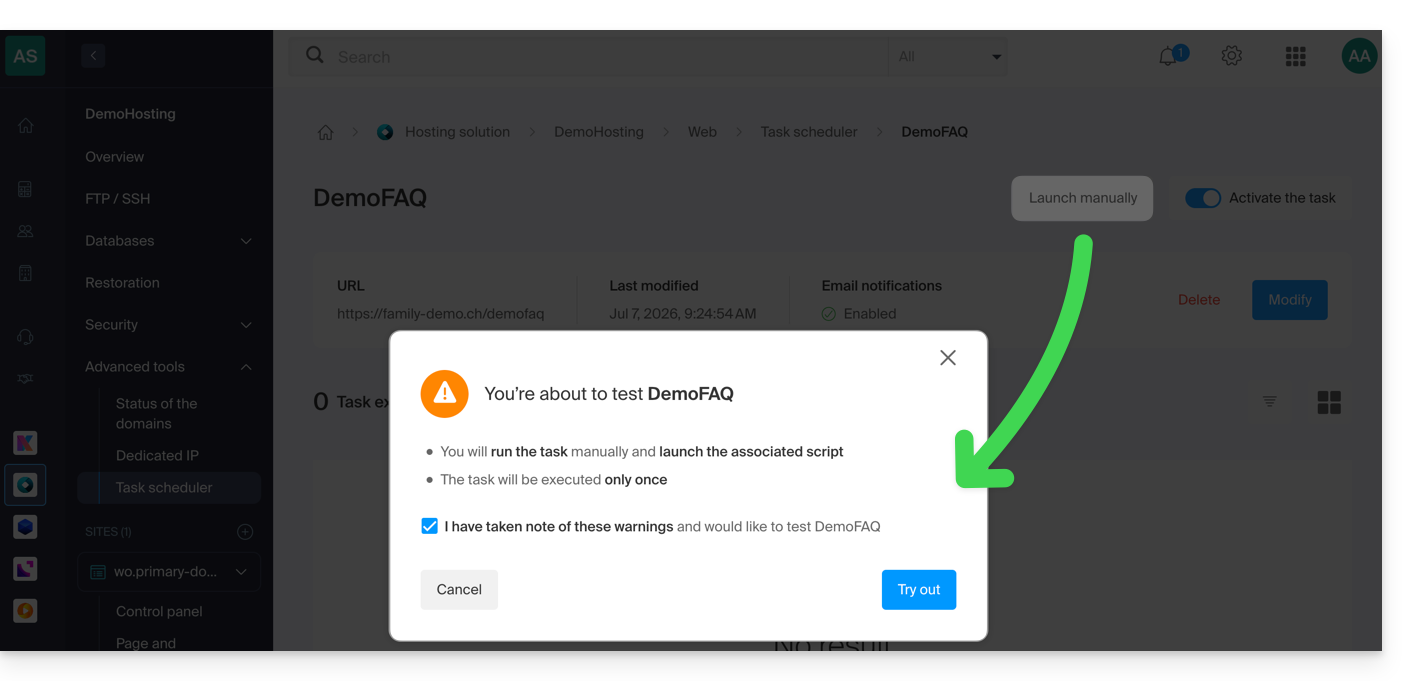
Link to this FAQ: https://faq.infomaniak.com/2161
Has this FAQ been helpful?