Knowledge base
1000 FAQs, 500 tutorials and instructional videos. Here, there are only solutions!
Delete one or more email addresses
This guide explains how to delete an email address from the Mail Service Infomaniak.
Delete one or more email addresses
Prerequisites
- Have a Mail Service on your Manager Infomaniak.
- Be Administrator or Legal Representative within the Organization.
Removing an email address or terminating a user account is done through the Mail Service dashboard. This action will disconnect the associated services and requires special attention to the preservation of existing data. To remove an email address (its content will be permanently deleted):
- Click here to access the management of your Mail Service on the Infomaniak Manager (need help?).
- Click directly on the name assigned to the Mail Service concerned.
Once in front of the email address table: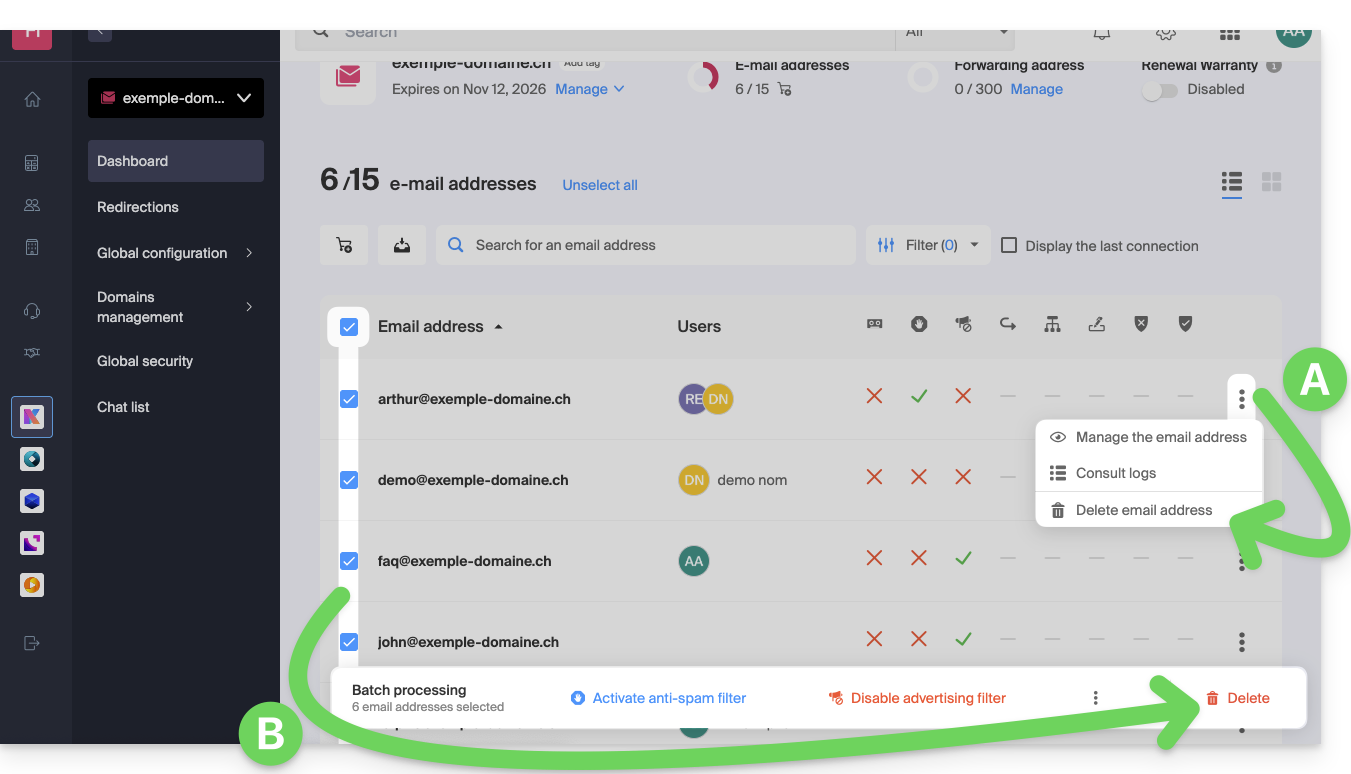
A. Delete one address at a time
- Click on the action menu ⋮ located to the right of the item concerned.
- Choose to delete the email address.
B. Delete multiple addresses at once
- Select the addresses to delete by checking the boxes to the left of the line.
- Click on Delete at the bottom of the screen.
Link to this FAQ:
Has this FAQ been helpful?