1000 FAQs, 500 tutorials and explanatory videos. Here, there are only solutions!
Create an email address or delete it
This guide explains how to create an email address from the Mail Service Infomaniak, the powerful and secure solution for hosting your email addresses.
Preamble
- To create multiple email addresses in bulk, refer to this other guide.
- To create “virtual” addresses serving as redirections, refer to this other guide.
- Refer to this other guide if you are looking for additional information about invitations to use a new address (point
bbelow) or an existing address.
Create an email address
Prerequisites
- Have a Mail Service on your Infomaniak Manager.
- Have a quota of available addresses or adjust it in advance if necessary.
Then, to add the email address of your choice:
- Click here to access the management of your product on the Infomaniak Manager (need help?).
- Click directly on the name assigned to the product concerned.
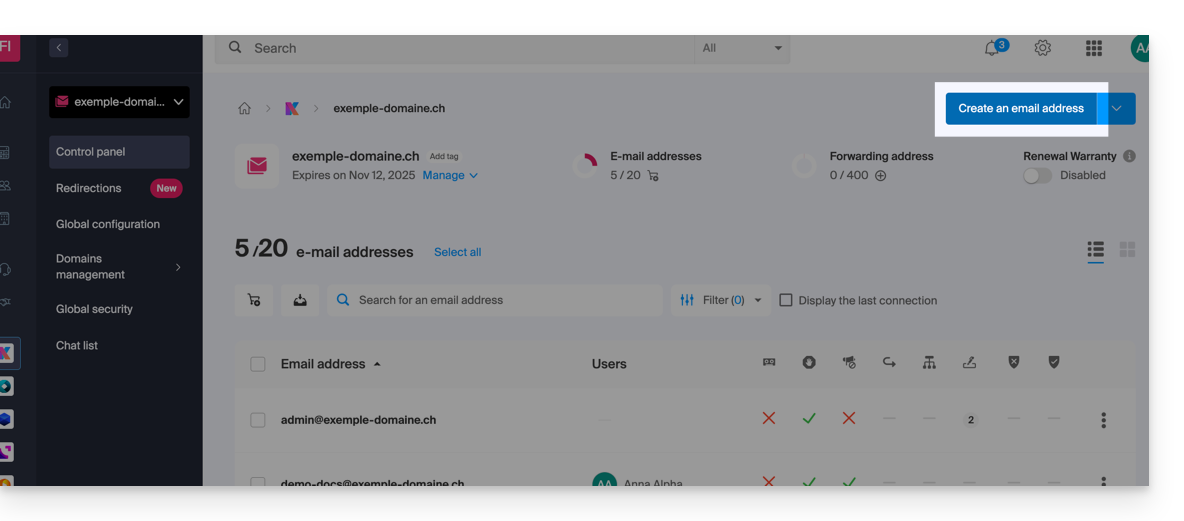
- Click on the blue button Create an email address at the top right:
- Enter the desired email address (only what comes before the at sign for example your first name — the domain name is already specified and any aliases are visible by hovering over the information icon ⓘ):
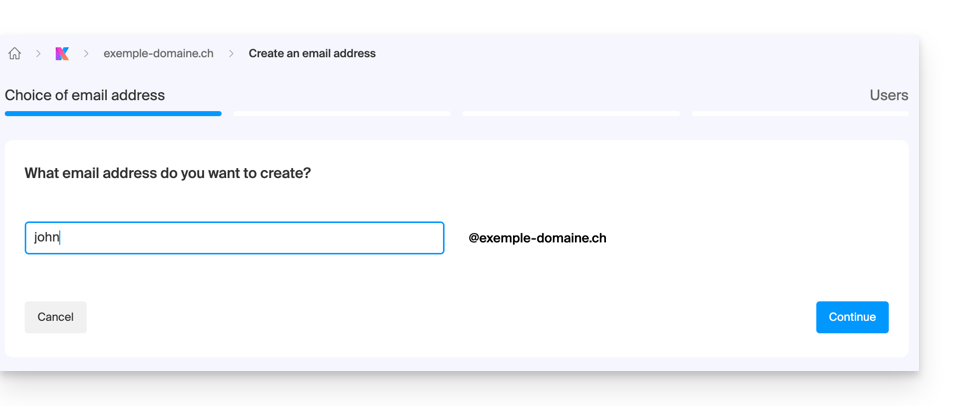
- Click on the Continue button.
Then…
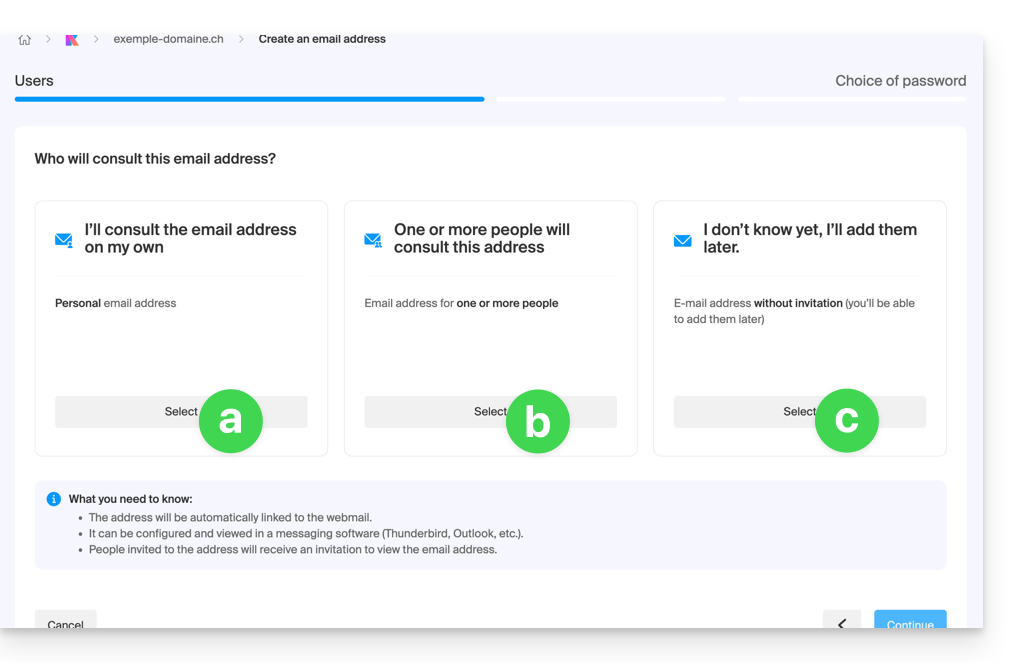
… depending on the intended use, choose the user concerned by the creation of the address...
a. ... yourself (simple and quick)
In this case, the assistant will ask you to choose a secure password.
Then the email address is…
- ... created ...
- ... automatically added to the user's currently connected Mail Infomaniak...
- ... and immediately available to work in any mail software / client.
Note that any subsequent password change will cut access to the address everywhere (+ prompt to enter the new password) except on the original Mail app, i.e., the one from the account used to create the address on the Mail Service (point 2 above).
b. ... one or more other users
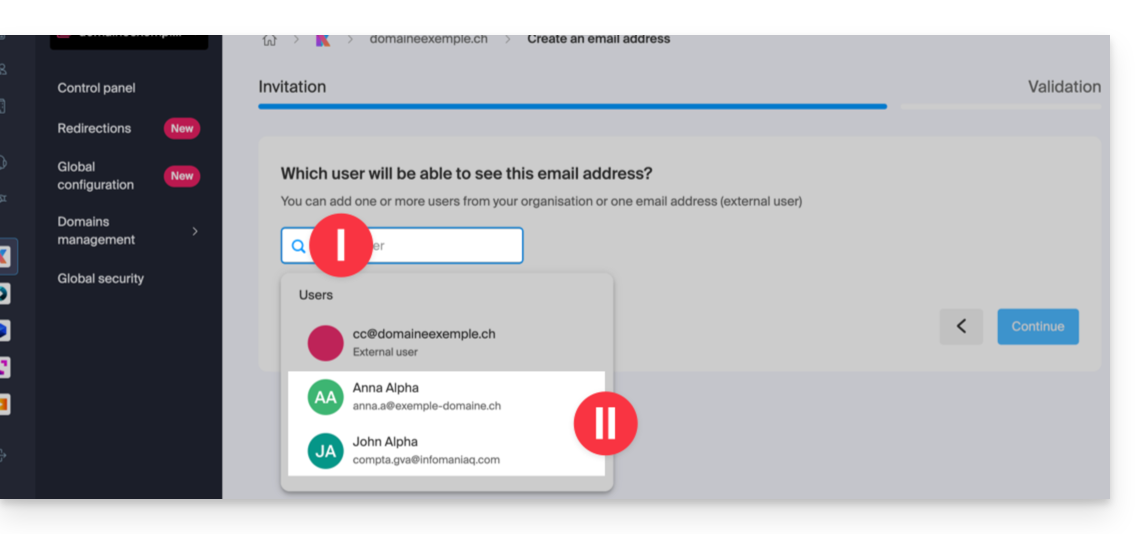
In this case click on the displayed text field and...
- ... select 1 or more existing users already on the same Organization, including yourself if you wish:
- If necessary, specify the users' permissions (automatically taken from the global configuration) including whether or not they can change the password later:
- You will be able to modify the user's permissions at any time from your Mail Service.
- You will then need to select a signature template and click on Continue.
- That's it, a randomly generated password will appear on your screen.
- If necessary, specify the users' permissions (automatically taken from the global configuration) including whether or not they can change the password later:
- ... or select the email address you are currently creating (but later, you will need to access it in some way to access the invitation)
- ... or enter the email address the user already has (for personal use, for example):
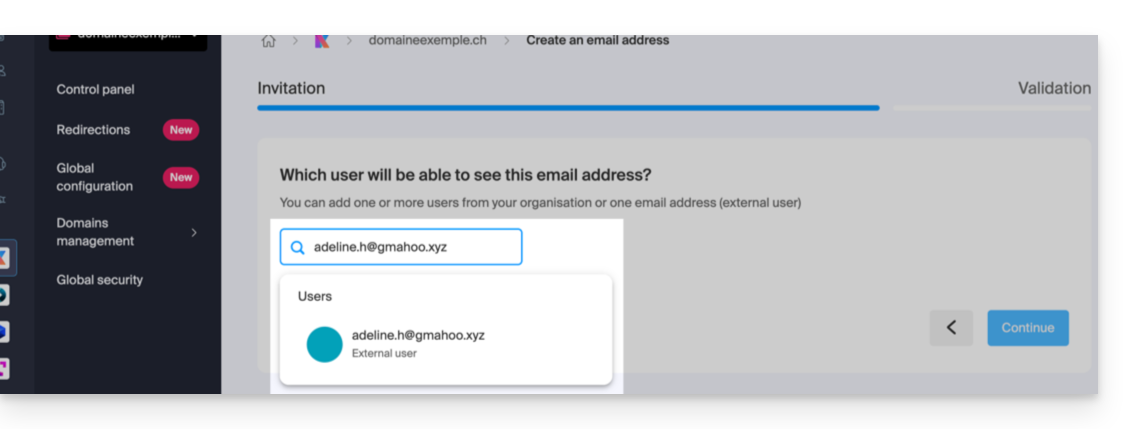
- In these 2 cases, you need to choose, under Advanced Options, how the user will connect to their new user account:
- either a connection with an identifier that will be exactly corresponding to the email address created
- or a connection with the identifier of their choice (a personal email address, for example)
- If necessary, specify the users' permissions (automatically taken from the global configuration) including whether or not they can change the password later:
- You will be able to modify the user's permissions at any time from your Mail Service.
- You will then need to select a signature template and click on Continue.
- That's it, a randomly generated password will appear on your screen unless you have invited a user to their personal address by forcing them to connect with the created address.
- In these 2 cases, you need to choose, under Advanced Options, how the user will connect to their new user account:
c. ... “I DON'T KNOW”
The steps will be exactly the same as in point a. above except for point 2 (no automatic addition to Mail Infomaniak).
Additional actions (button )
Click on the chevron to the right of the Create an email address button to access additional actions:
- Create a generic email address of type:
- no-reply (for sending confirmations, validations, invoices, etc.)
- catchall (allows receiving all messages for which there is no specific email address on your domain)
- Create multiple email addresses: allows creating multiple email addresses at once using a
CSVfile. - Create “virtual” addresses serving as redirection.
- Import content from other email addresses.
Delete one or more email addresses
To remove an email address (its content will be destroyed):
- Click here to access the management of your product on the Infomaniak Manager (need help?).
- Click directly on the name assigned to the product in question.
Once in front of the email address table:
A. Delete one address at a time
- Click on the action menu ⋮ located to the right of the item in question.
- Choose to delete the email address.
B. Delete multiple addresses at once
- Select the addresses to delete by checking the boxes to the left of the line.
- Click on Delete at the bottom of the screen.

